Configure ICU Facility Settings Using Heartscare Platform
This tutorial guides you through managing ICU facility settings as a facility admin user
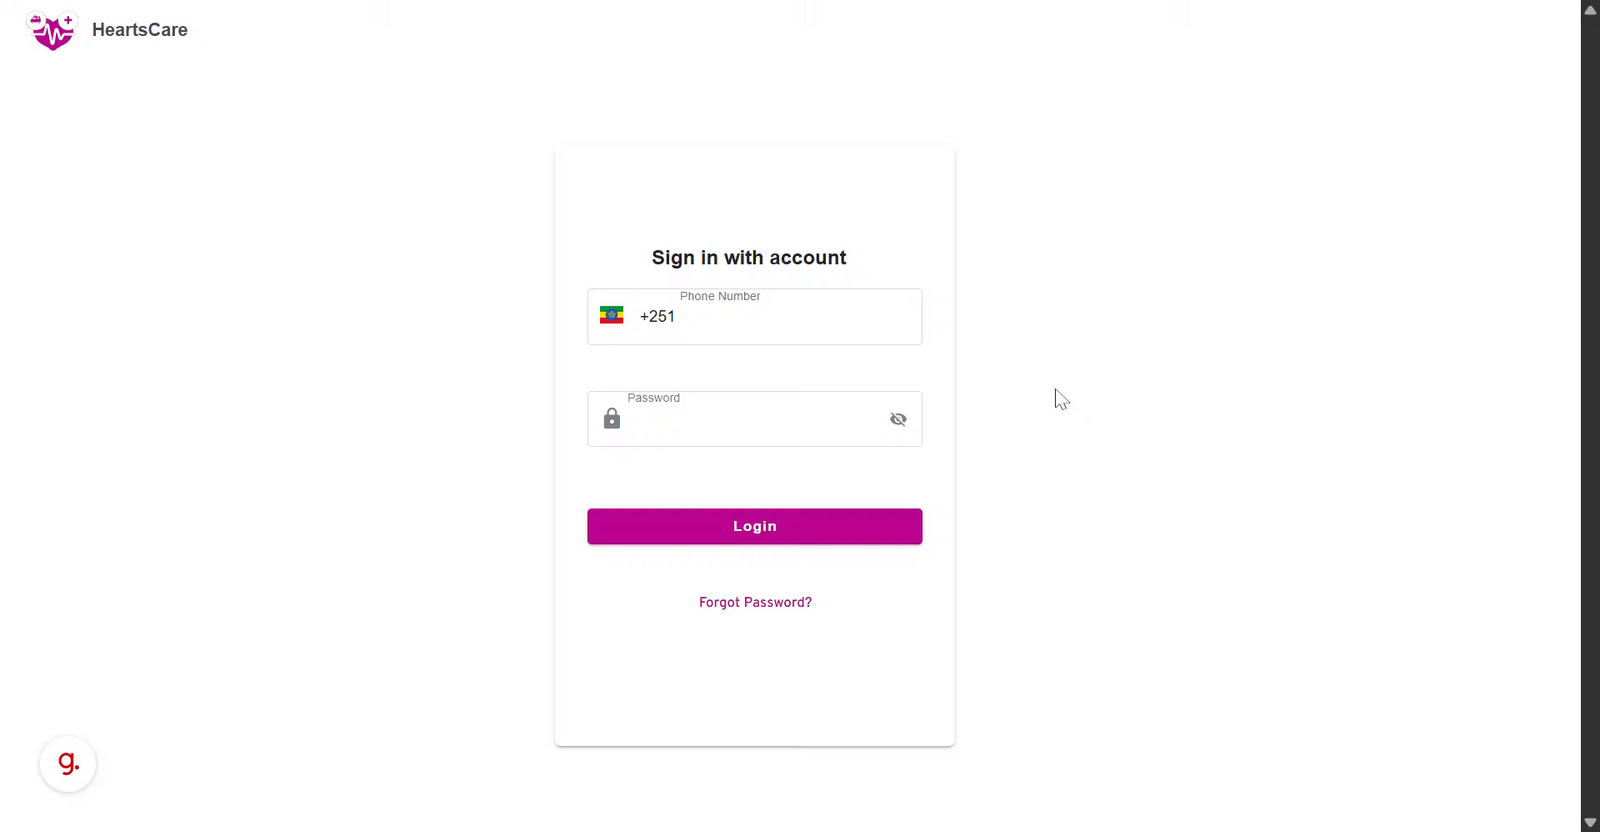
Login Process
You will learn how to access the Heartscare platform using your credentials.
1. Introduction
You will learn how to update unit details, manage beds, and handle user accounts within the ICU Tracker system.
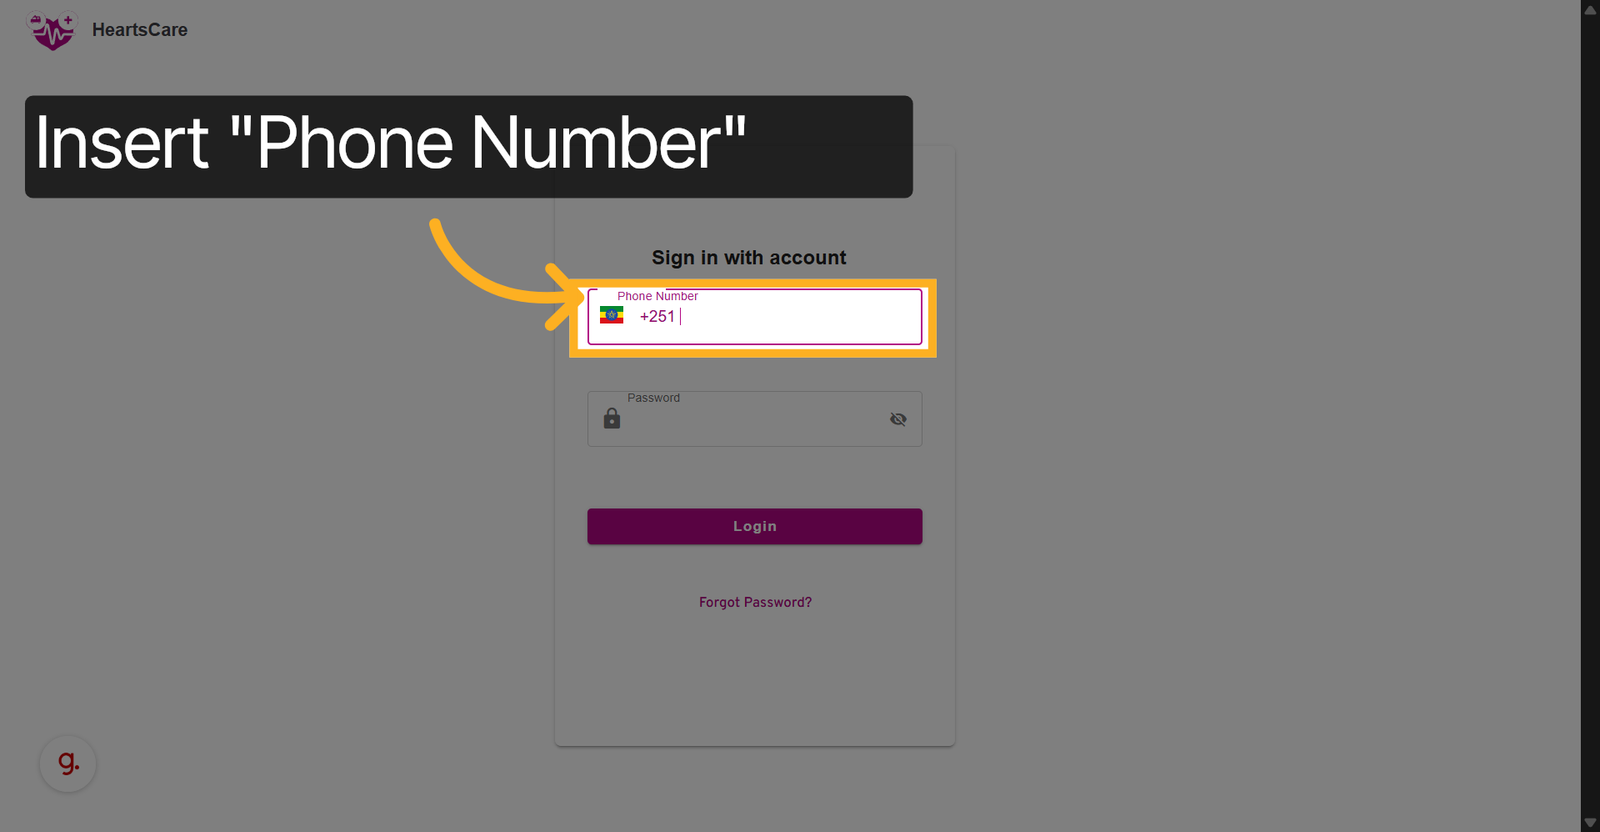
2. Enter Your Phone Number
Click the Phone Number field to begin entering your login credentials.
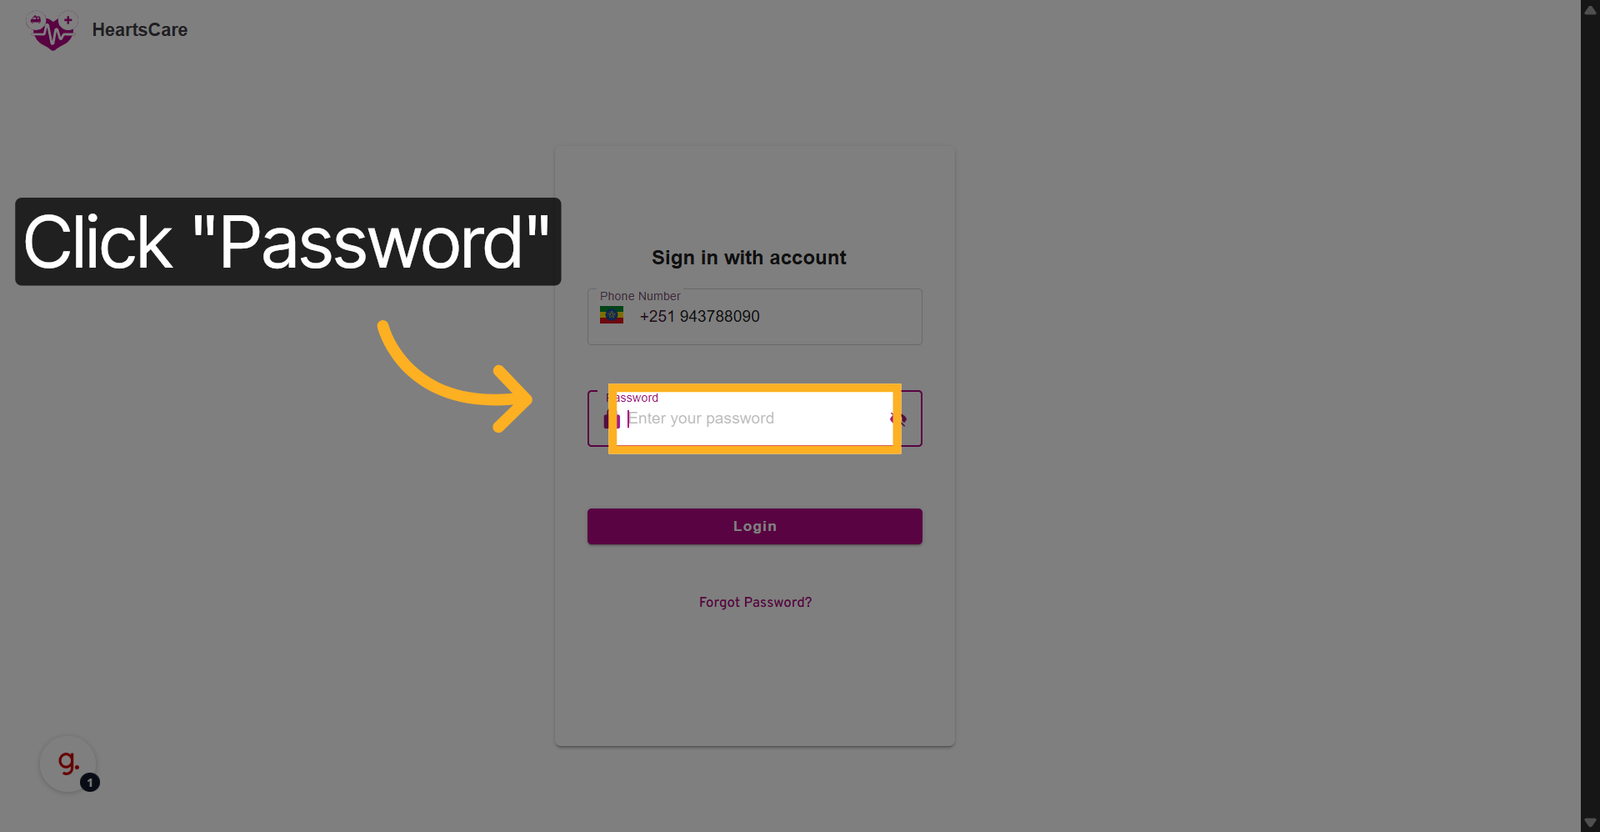
3. Enter Password
Enter your password to authenticate your access to the system.
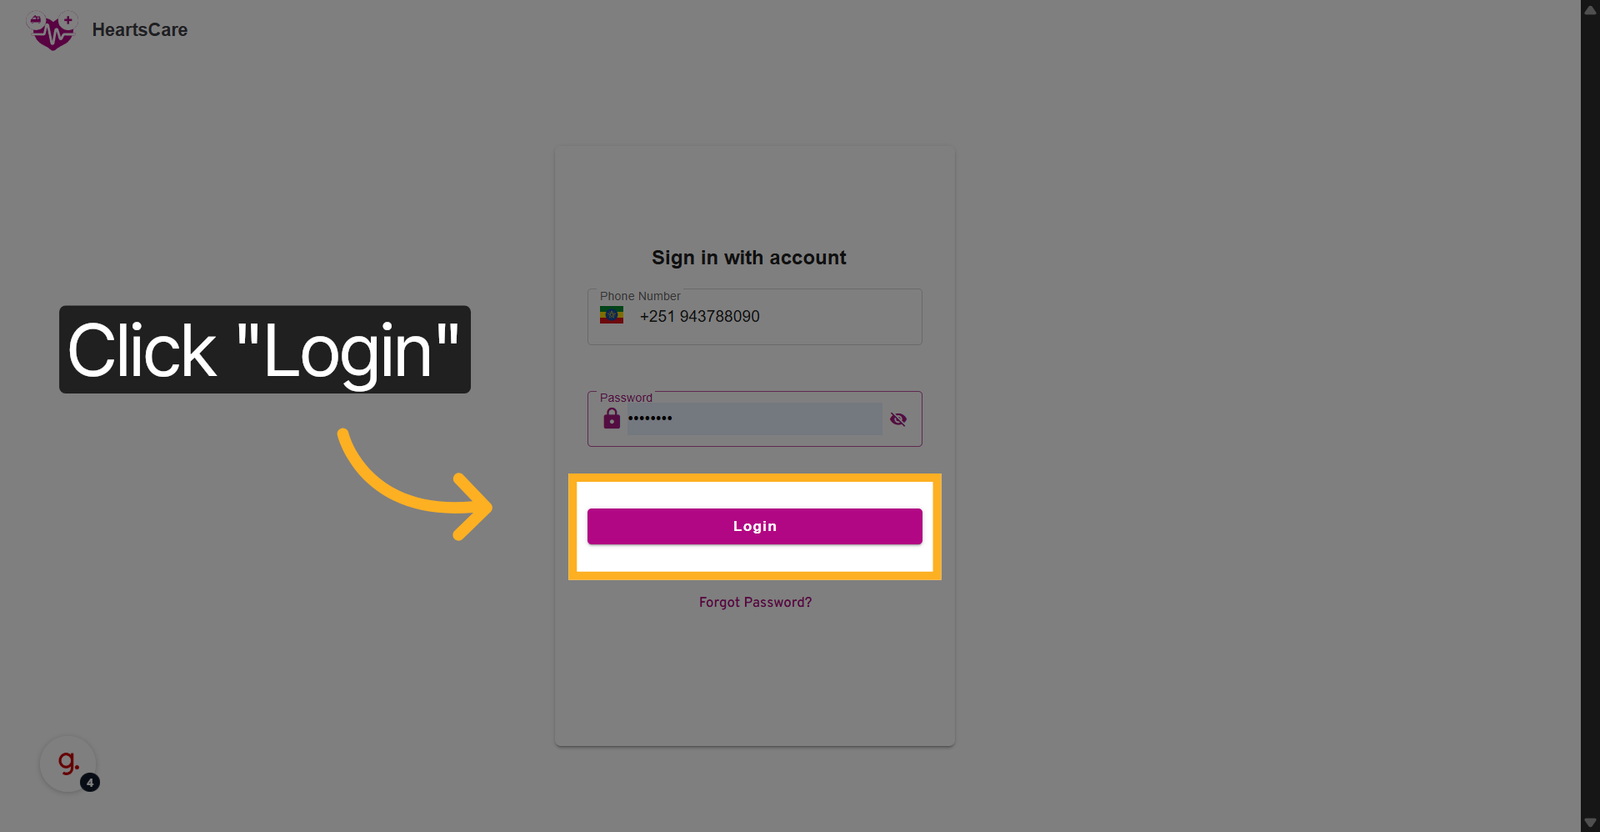
4. Click Login Button
Click the Login button to proceed with signing into the Heartscare platform.
Dashboard Navigation
Learn how to navigate the main dashboard and access key features.
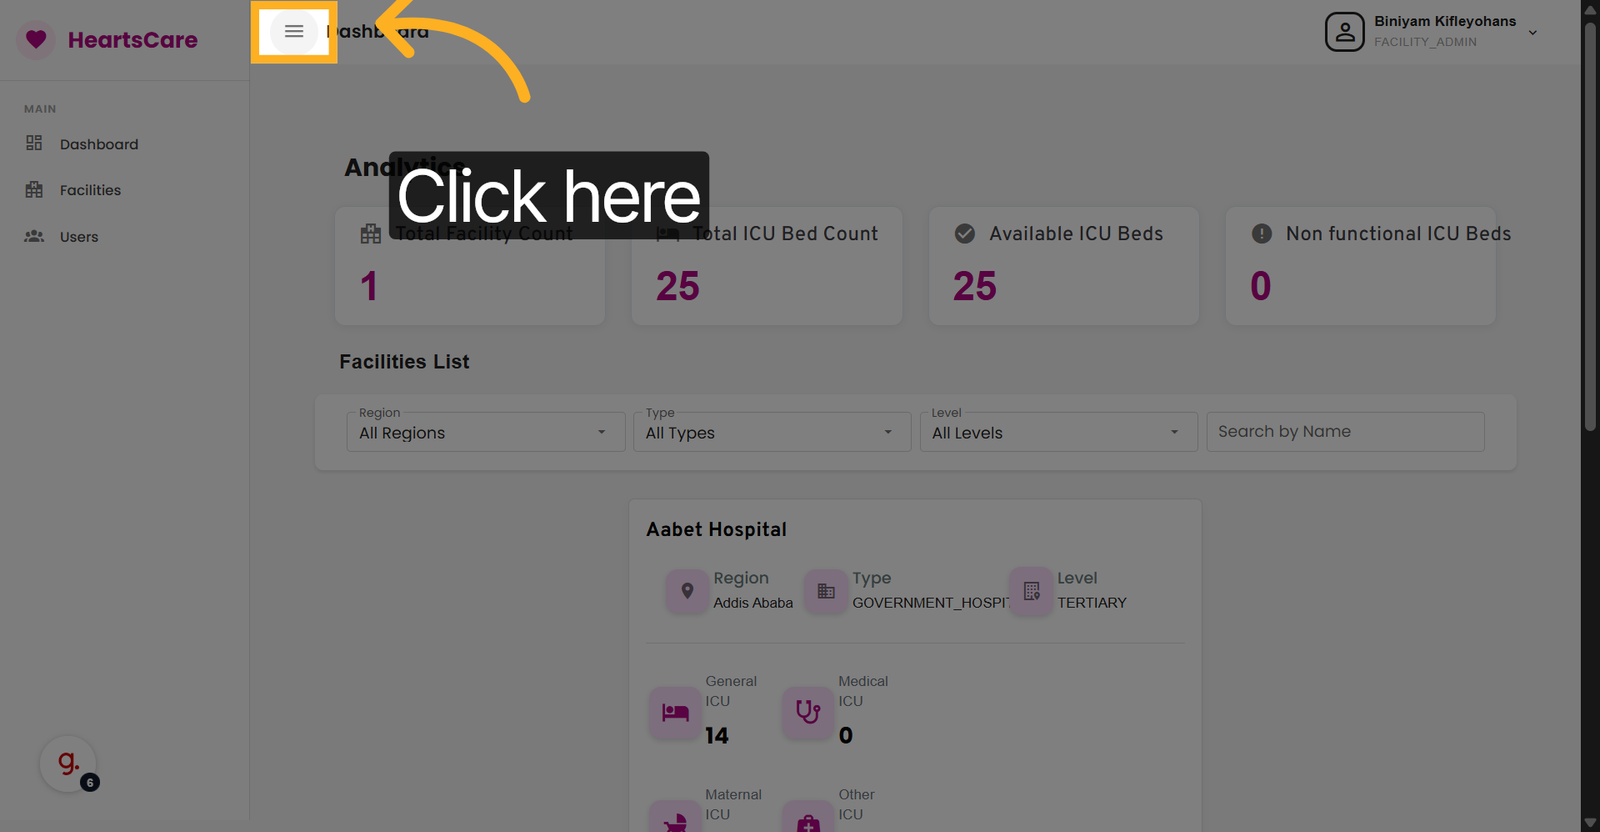
5. Access Main Menu
Click here to open the main menu for navigation within the application.
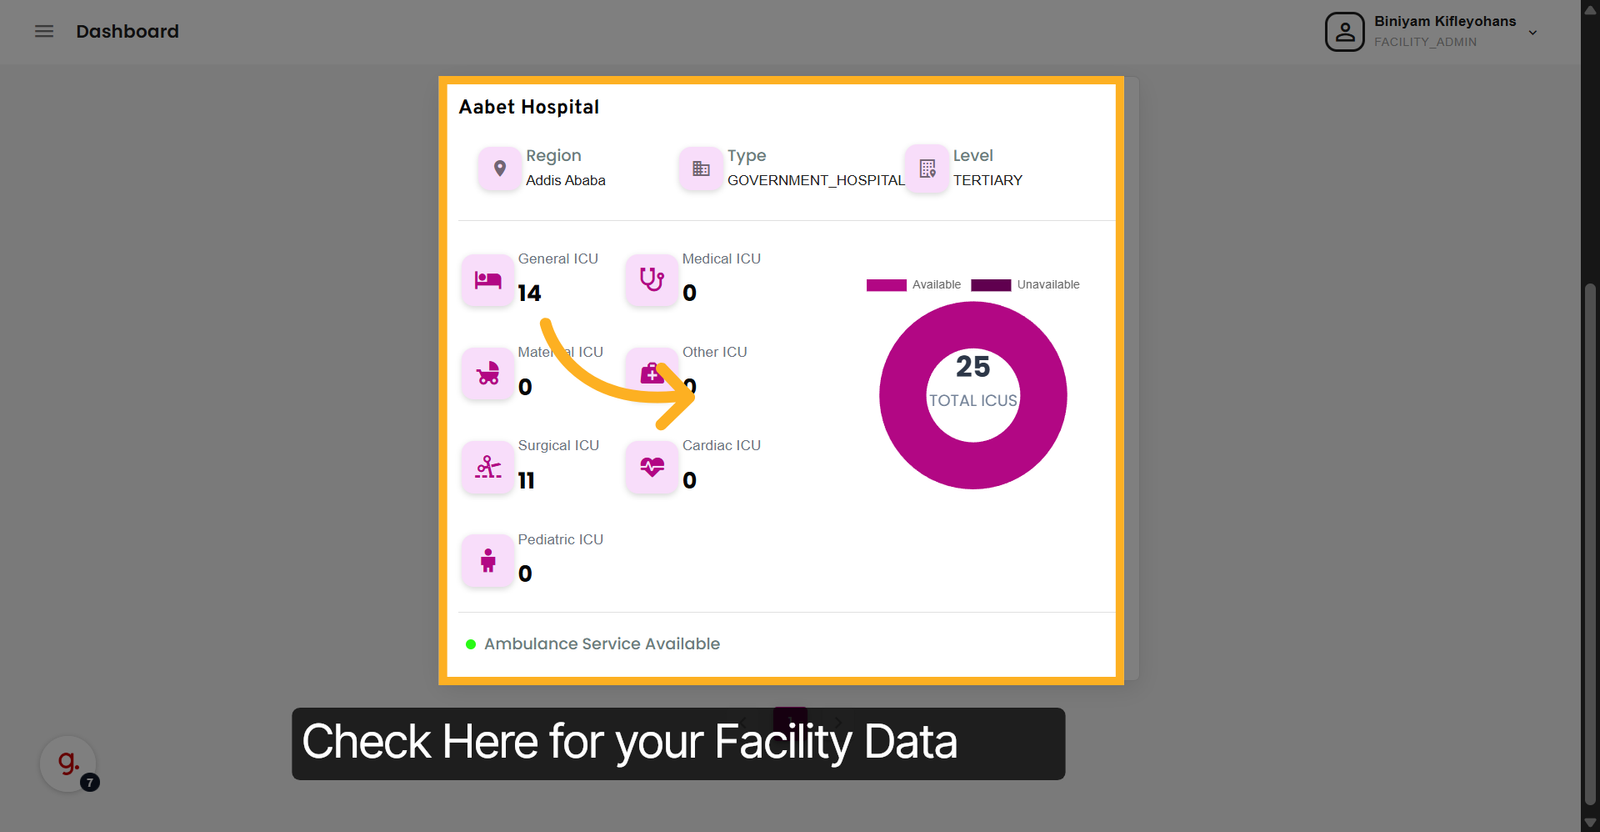
6. Open ICU Summary
Check the summary of all ICU units within the facility.
Unit Management
Manage ICU units, update bed counts, and configure unit settings.
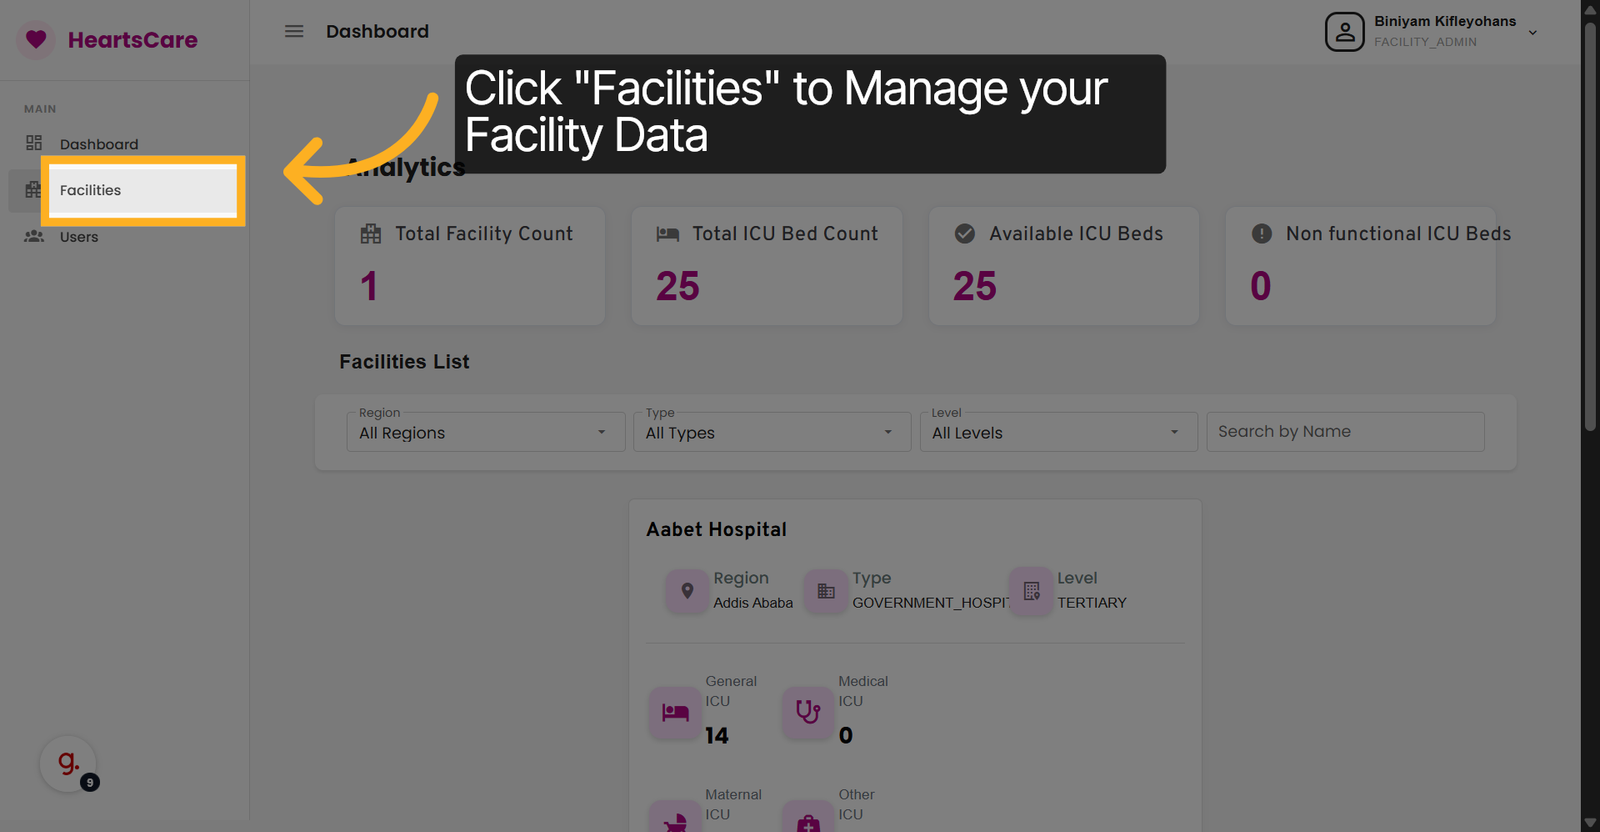
7. Click Facilities
Click Facilities to access the list of healthcare facilities managed in the system.
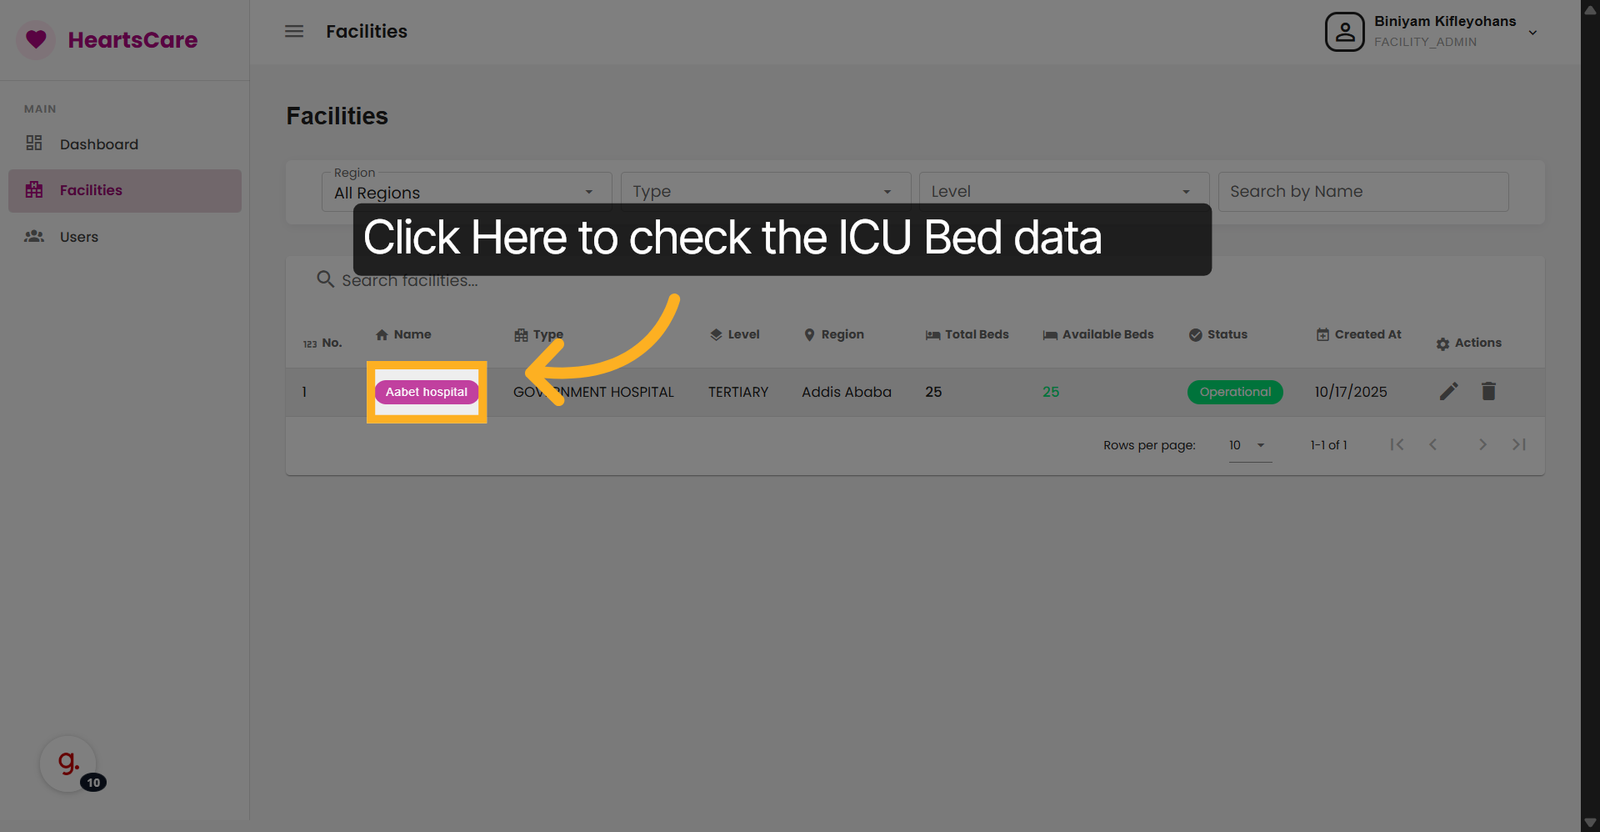
8. Select Facility
Click Facility Name to view and manage its ICU units and settings.
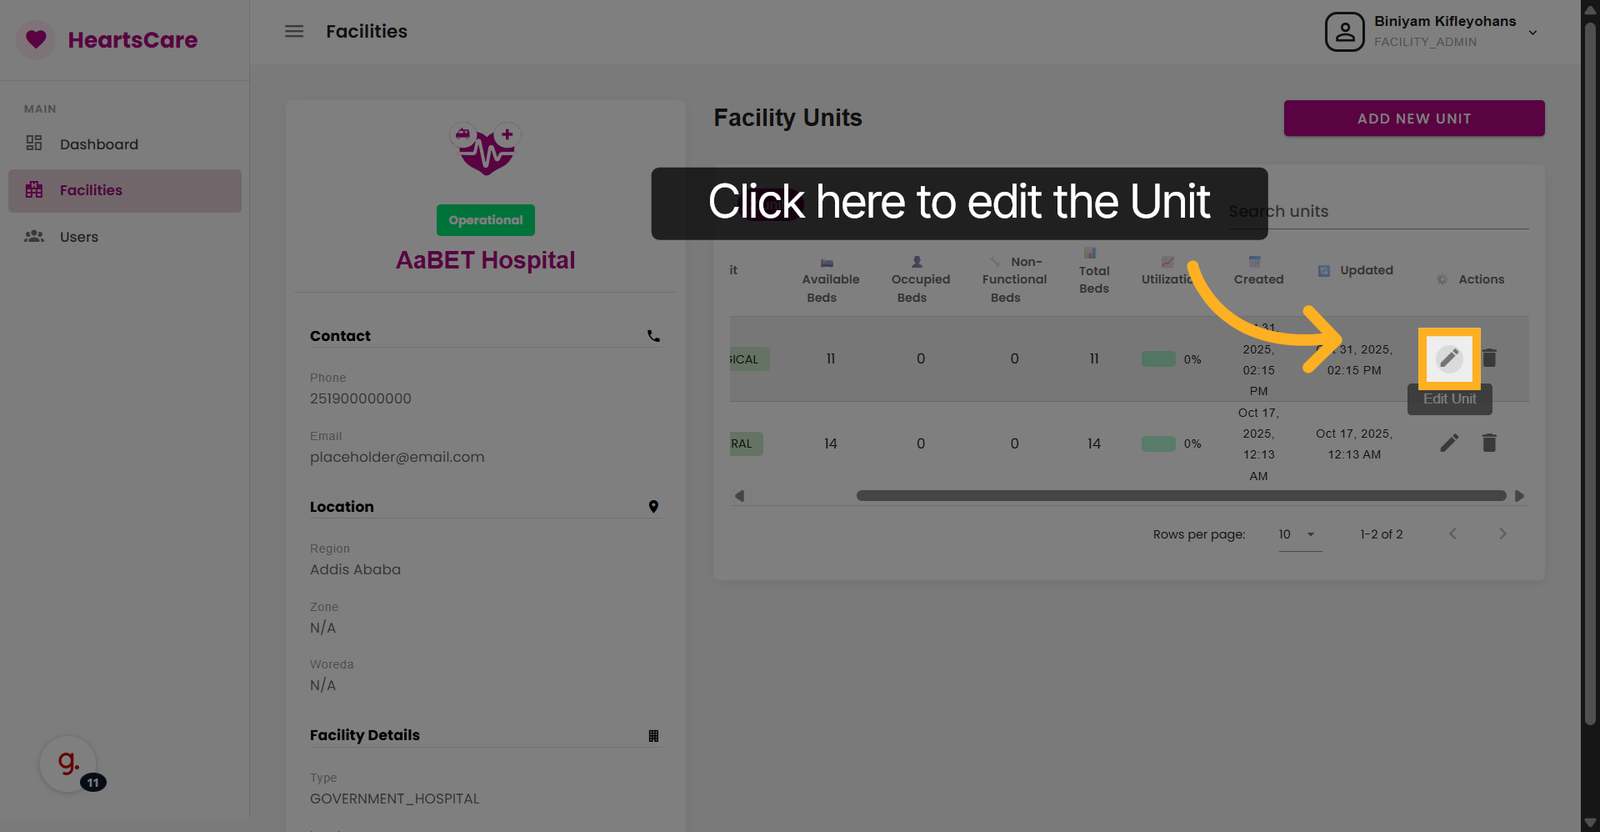
9. Proceed to Unit Management
Click here to Edit the unit for the selected facility.
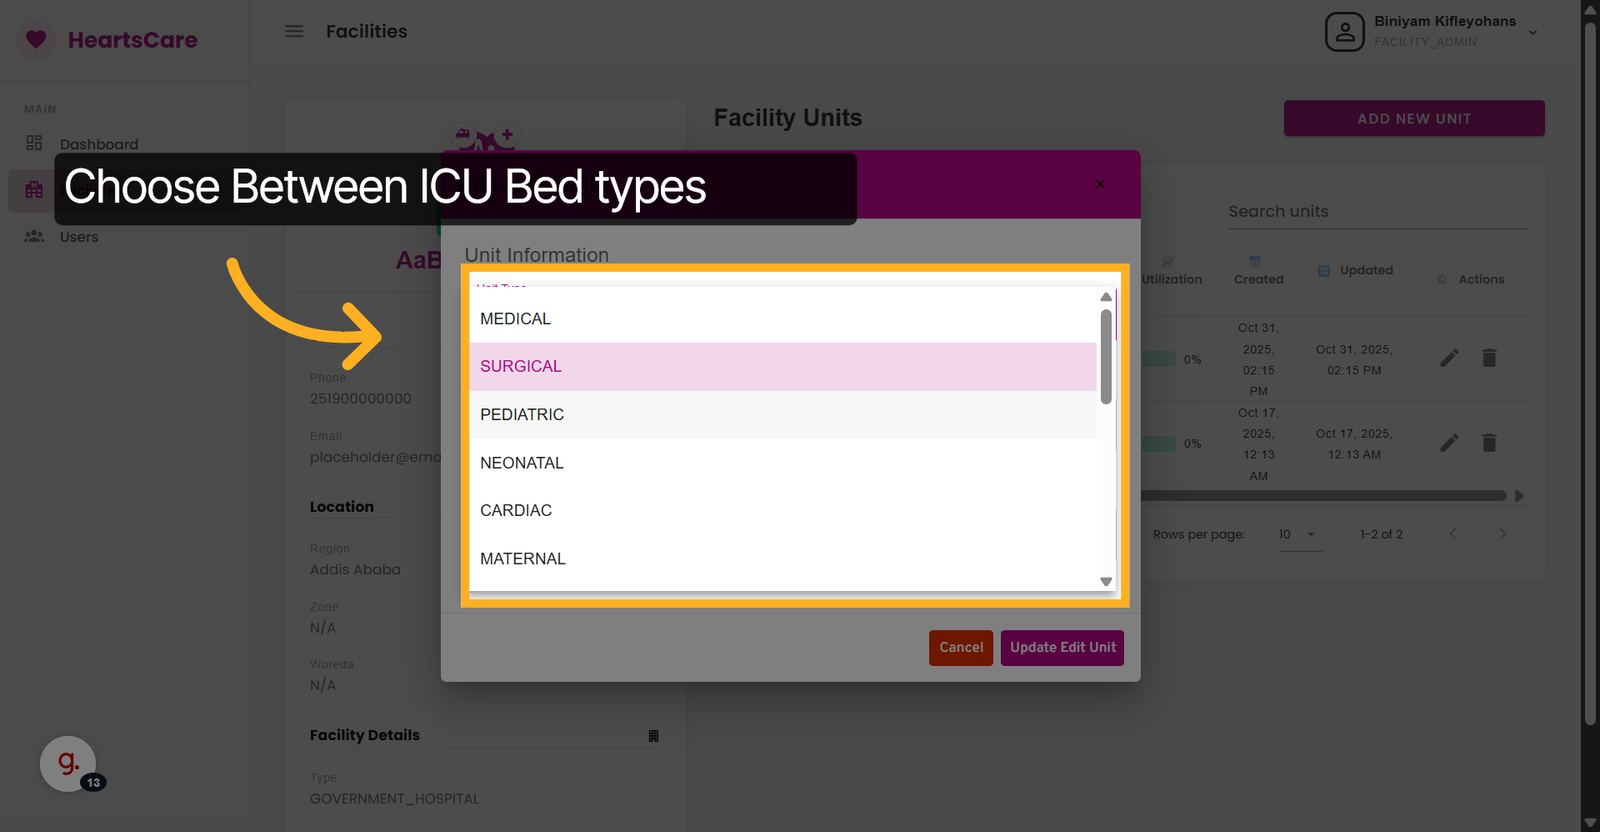
10. Select Unit Type Filter
Click Unit Type to filter ICU units by their designated categories.

11. Choose The Desired Unit
Select one unit type.
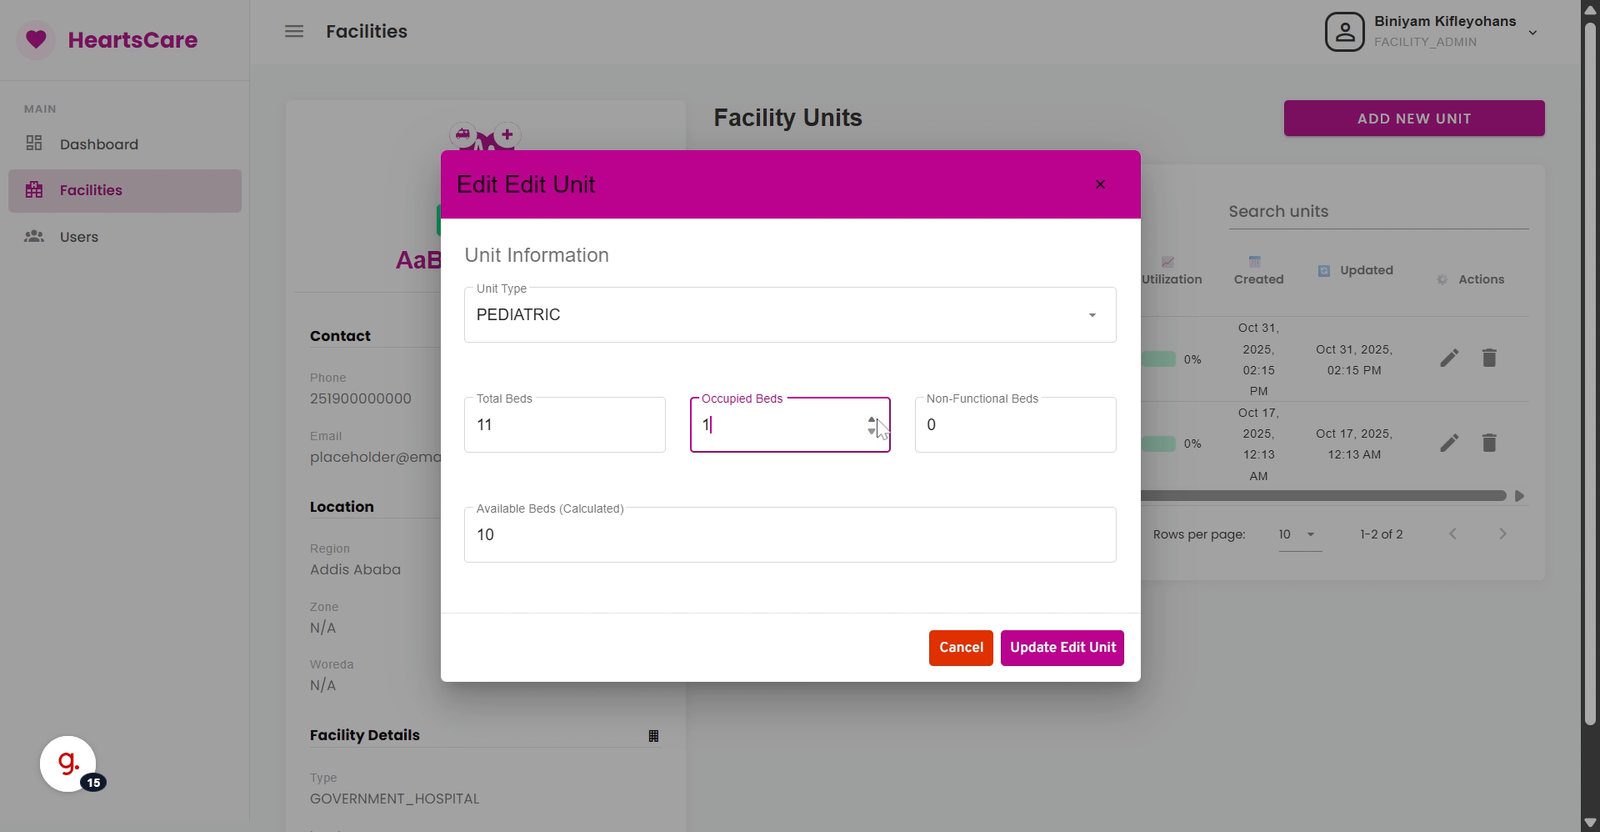
12. Select The Fields
Click the field to update the number of beds currently in use.
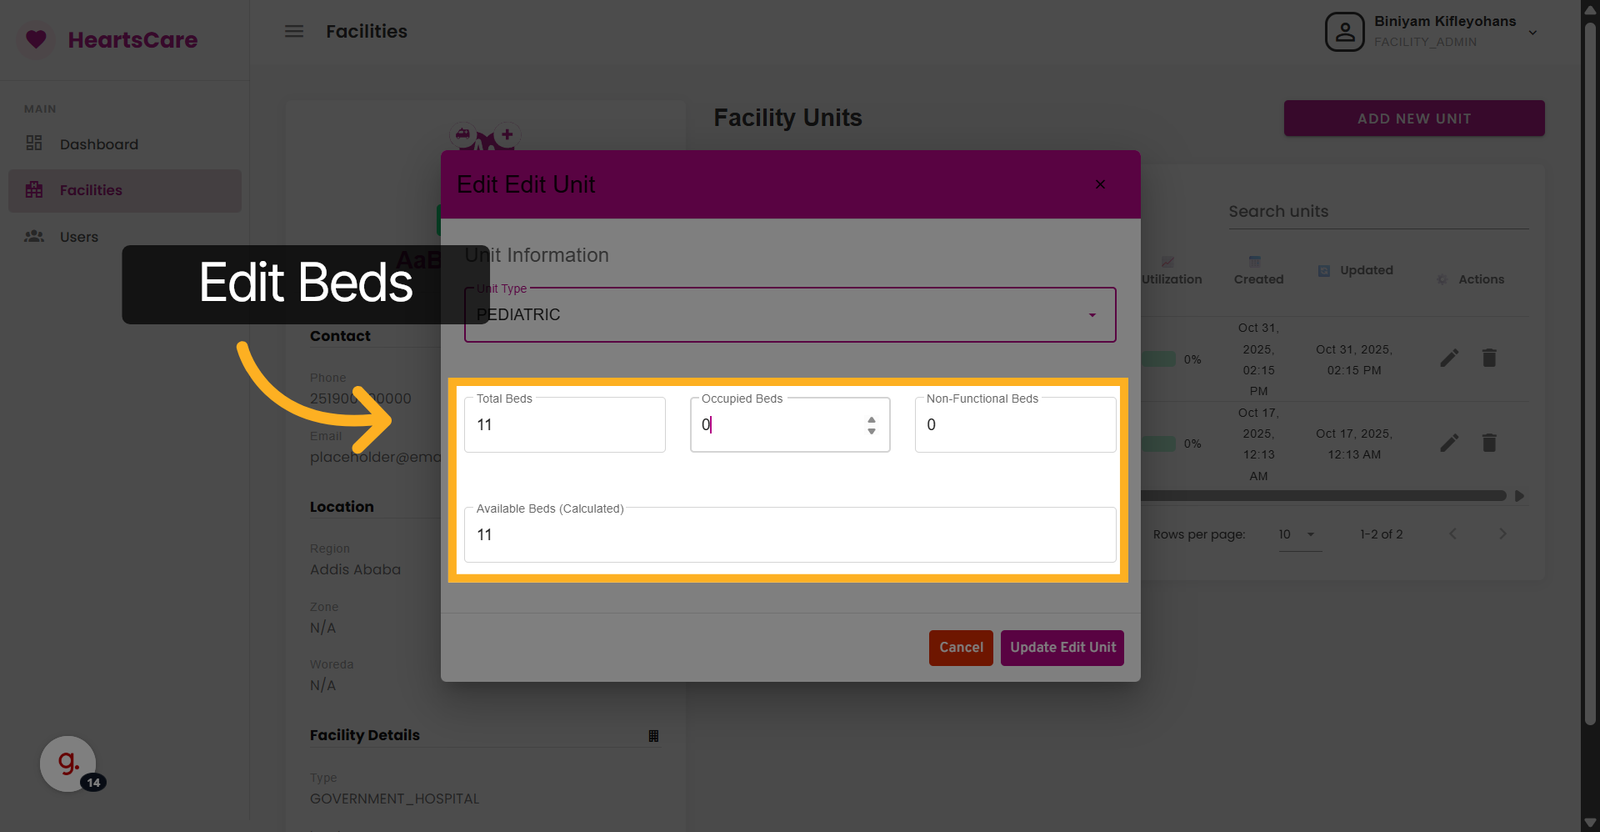
13. Enter ICU Beds Count
Enter the number (e.g. 1 indicates one bed is currently occupied in this unit.)
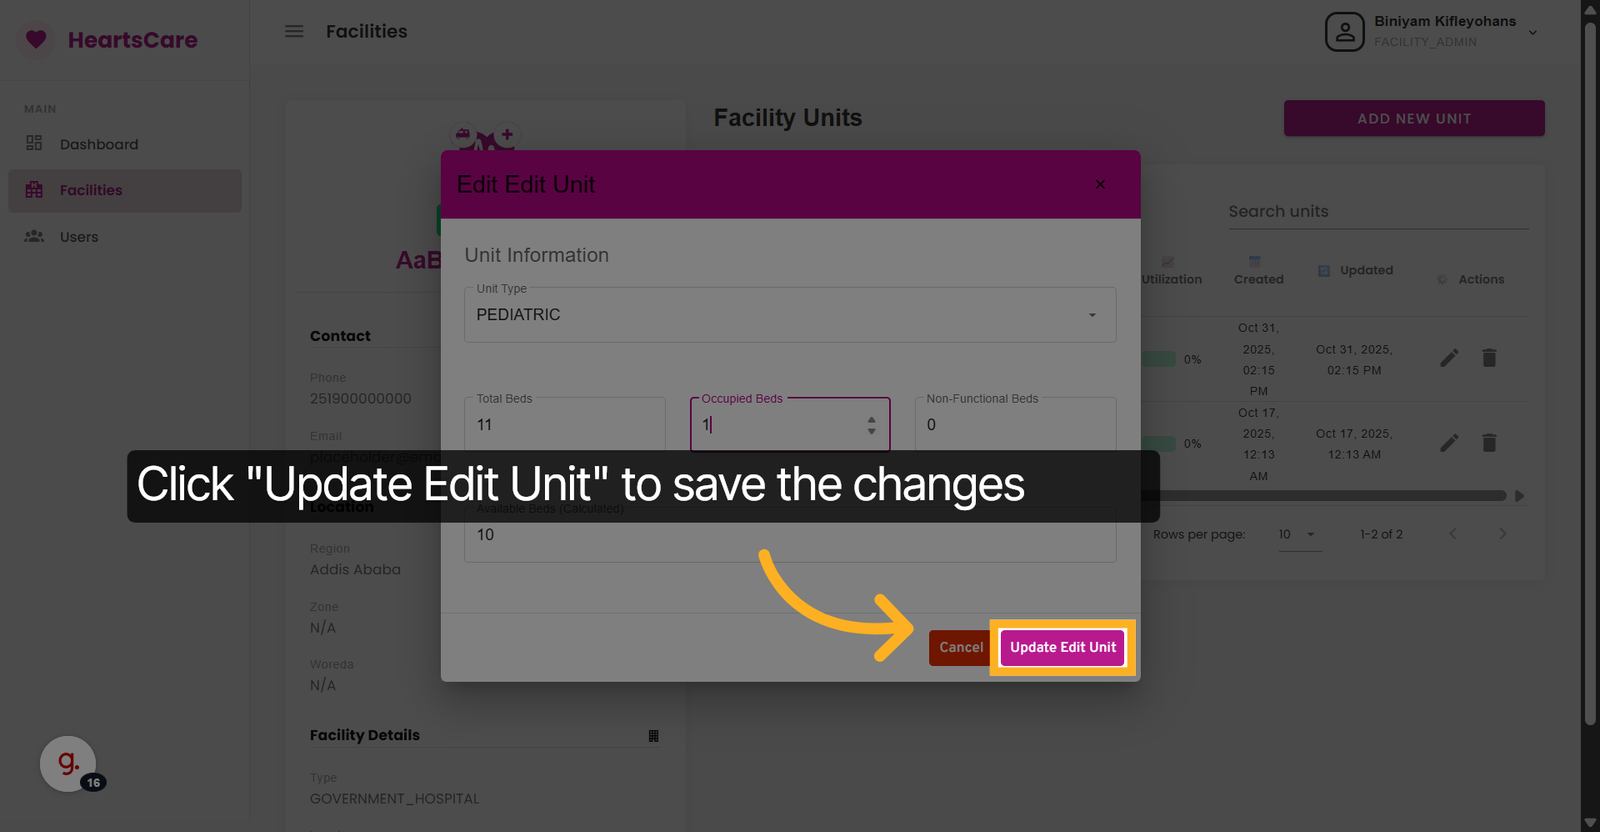
14. Submit Unit Update
Click Update Edit Unit to save the changes made to the unit's bed occupancy.
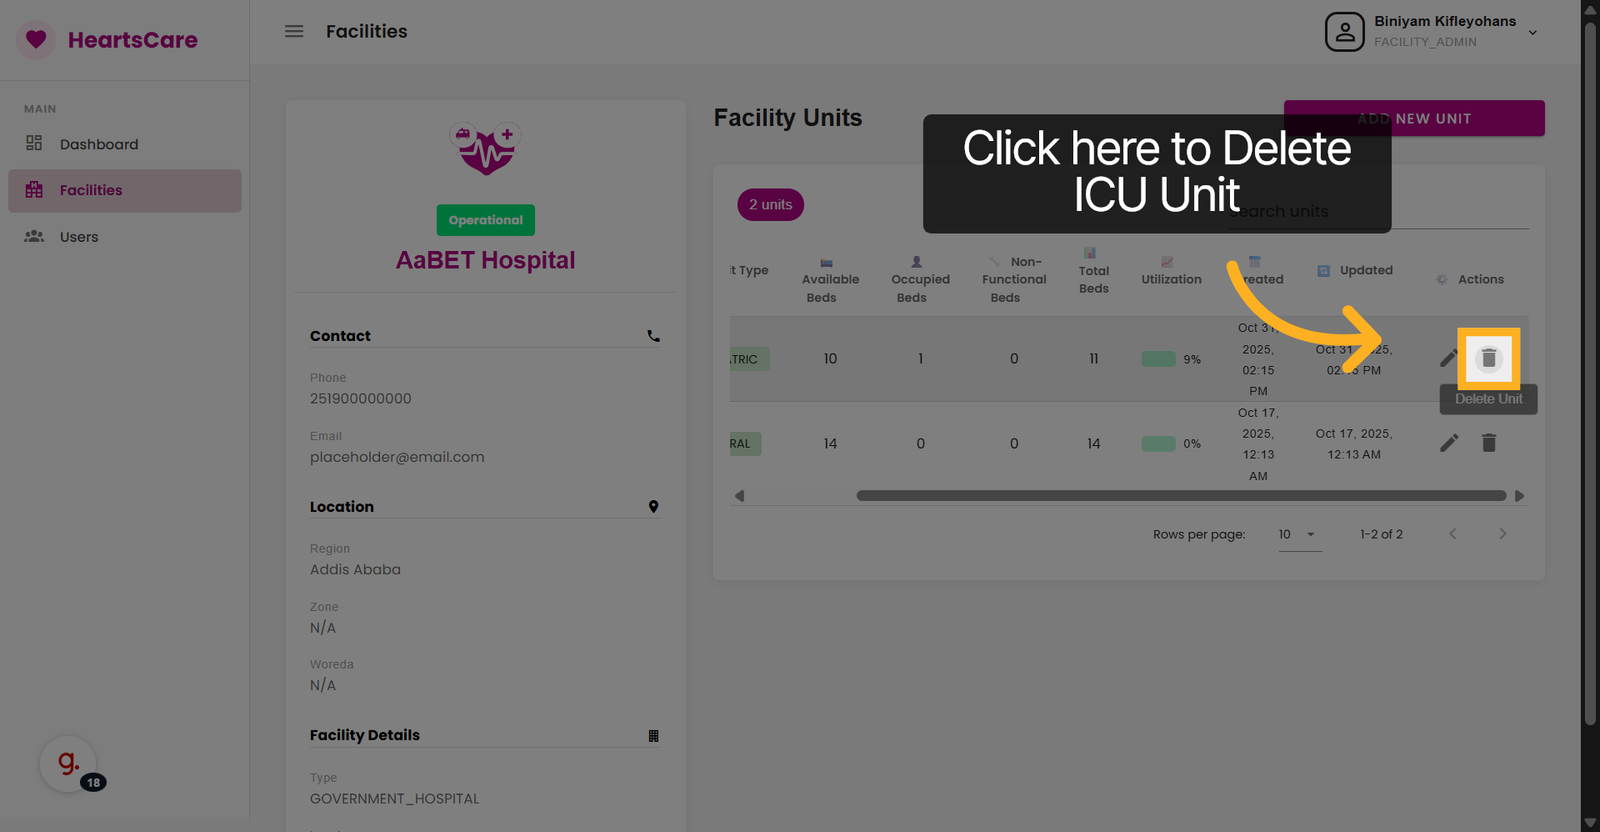
15. Select Delete Icon to Delete Unit
Click the icon to Delete ICU unit.
16. Select Delete Unit Again
Insert the unit's name to delete the ICU unit.
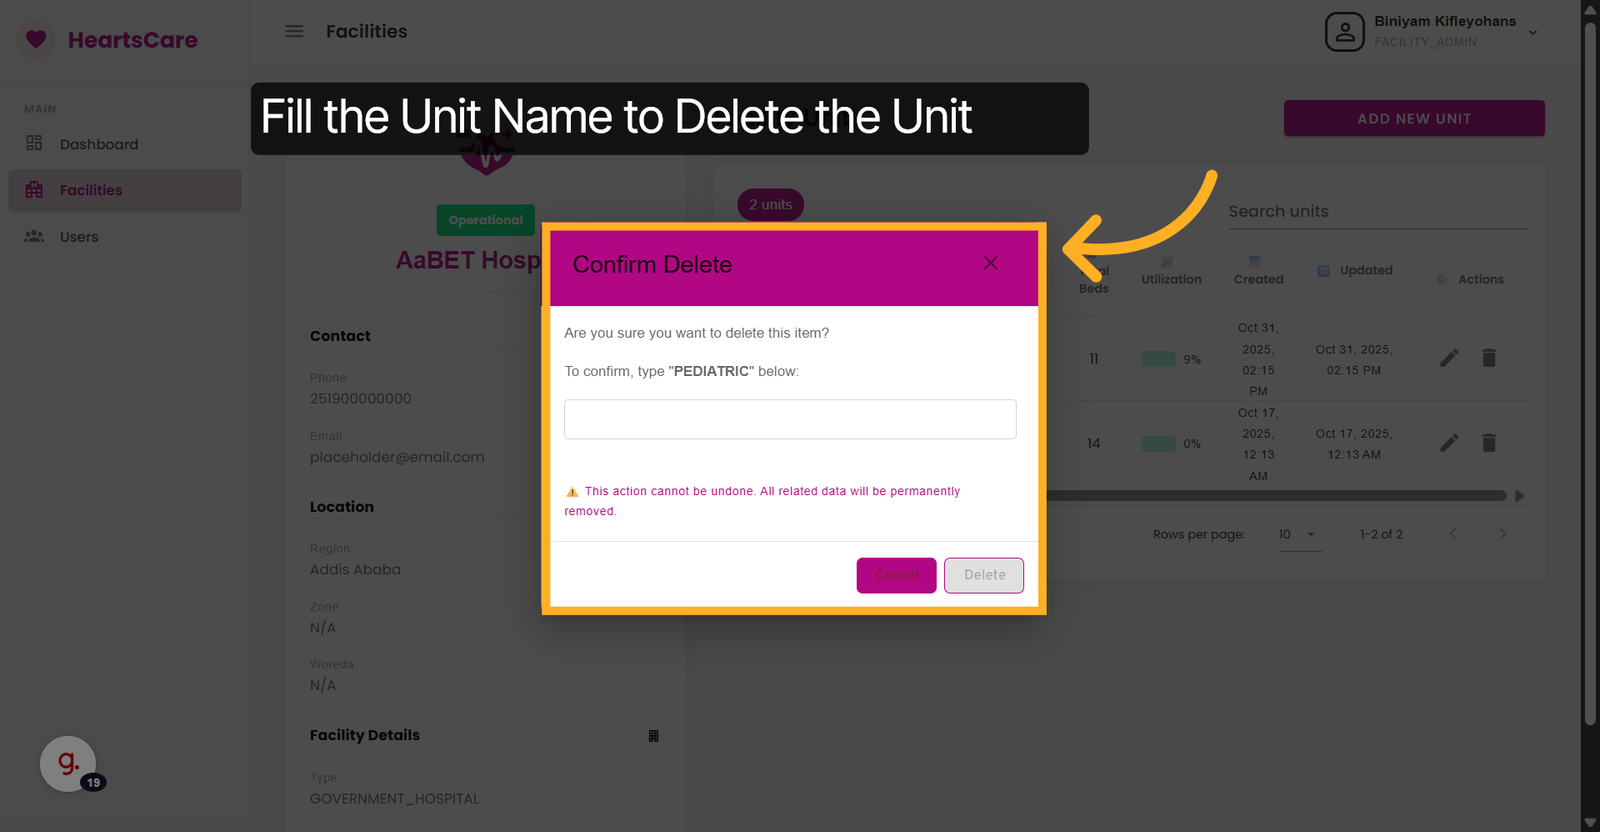
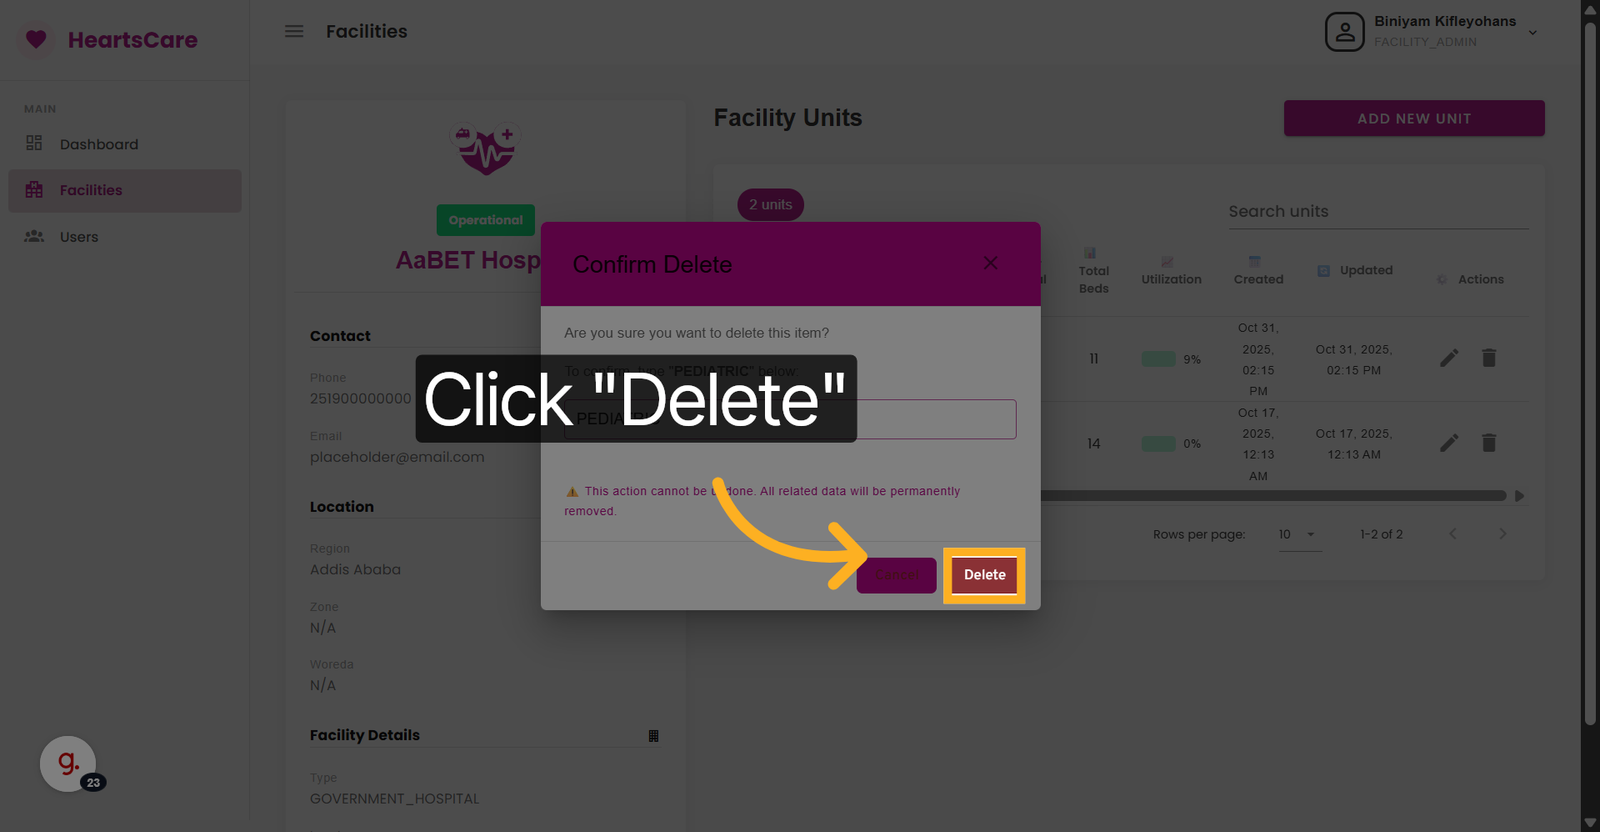
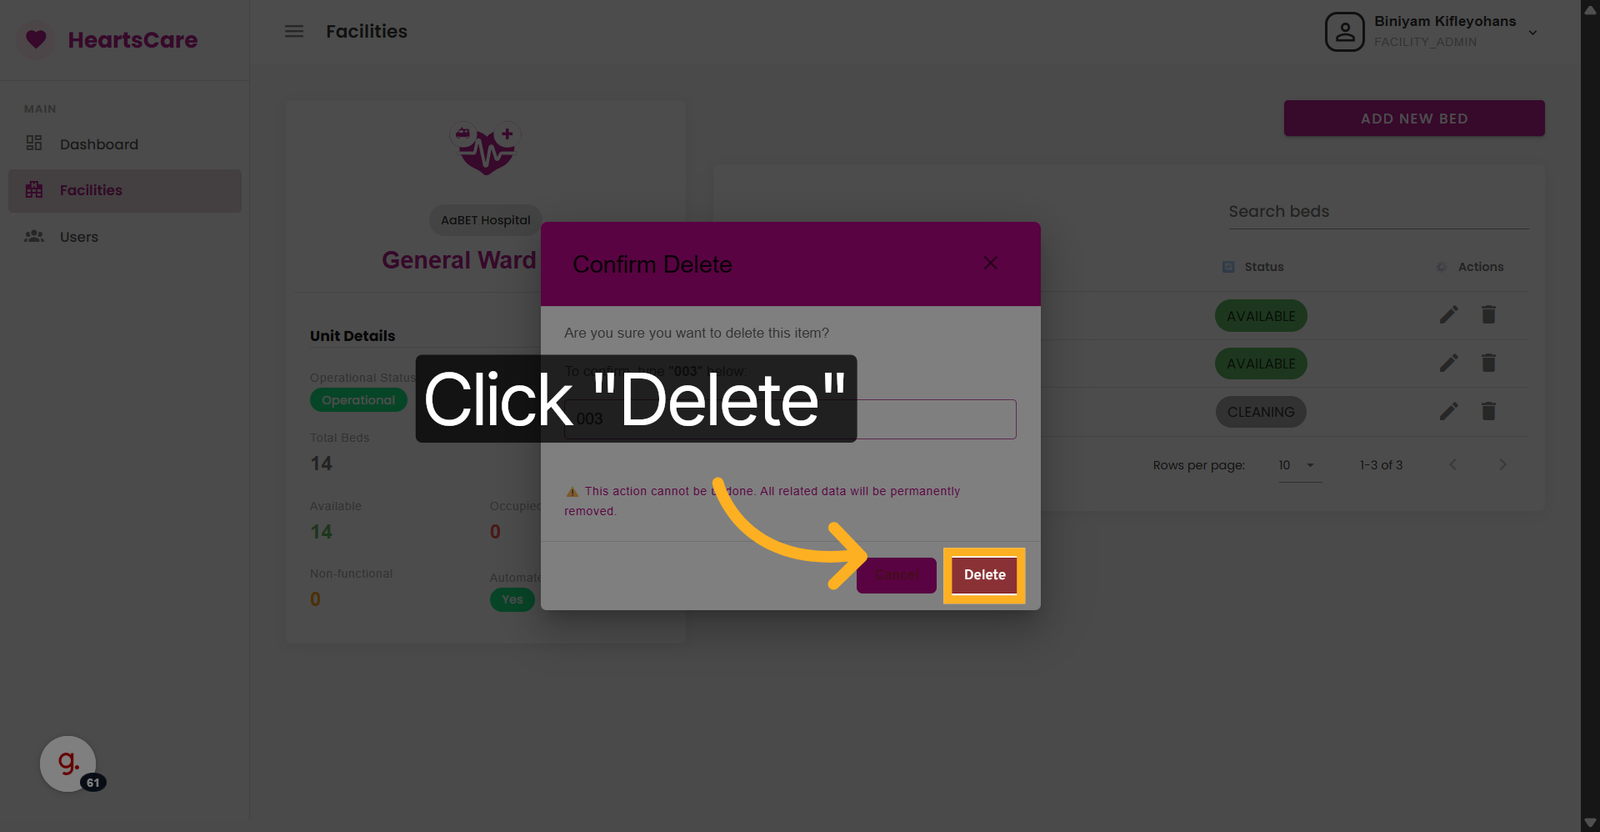
17. Delete Selected Unit
Click Delete to remove the selected unit from the facility.
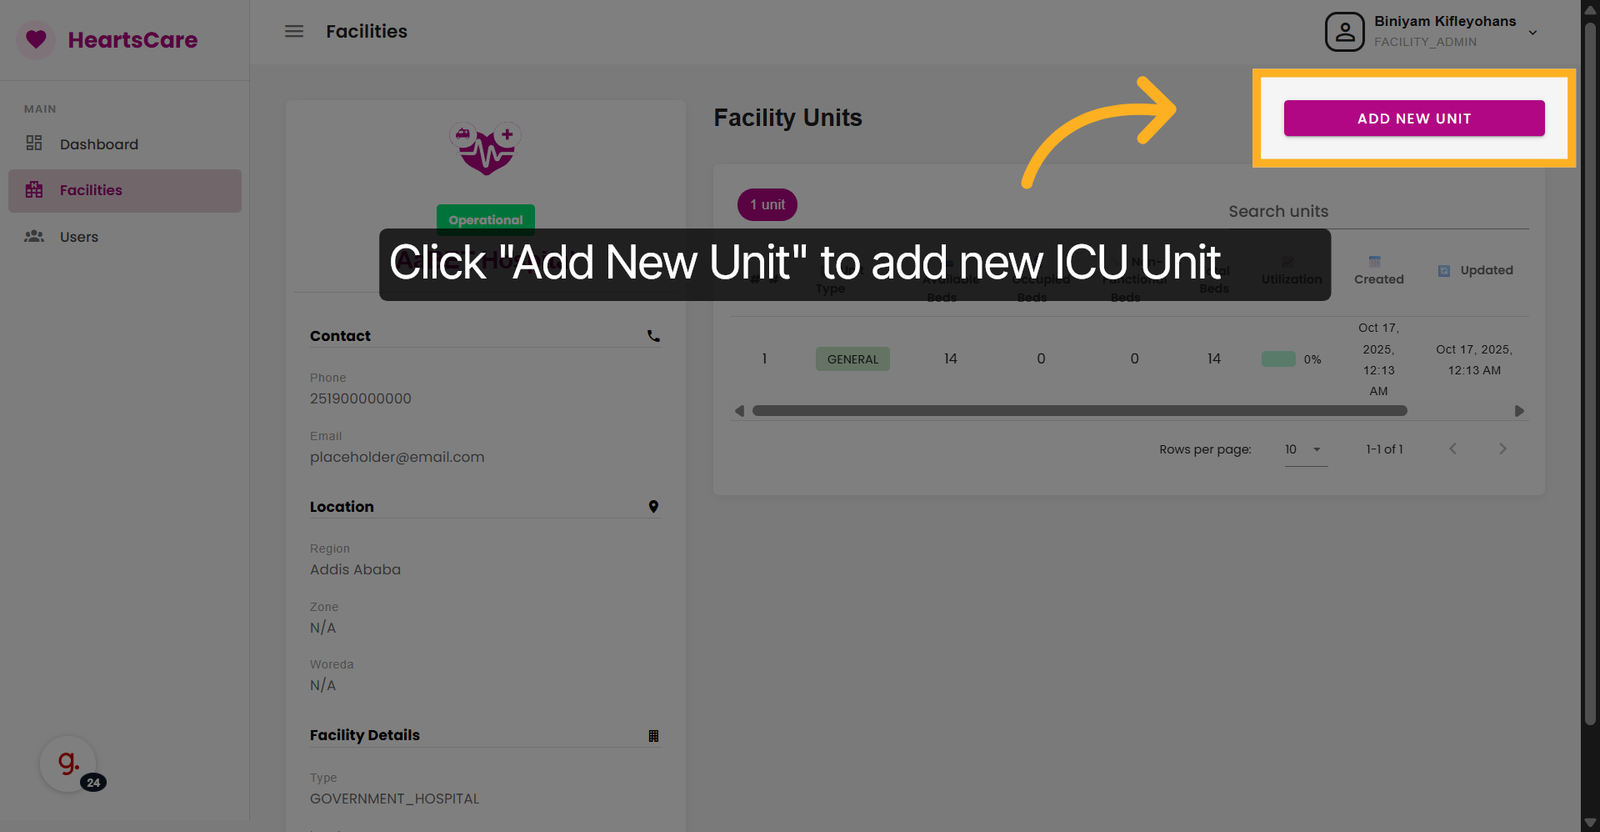
18. Initiate Adding New Unit
Click Add New Unit to start creating a new ICU unit within the facility.
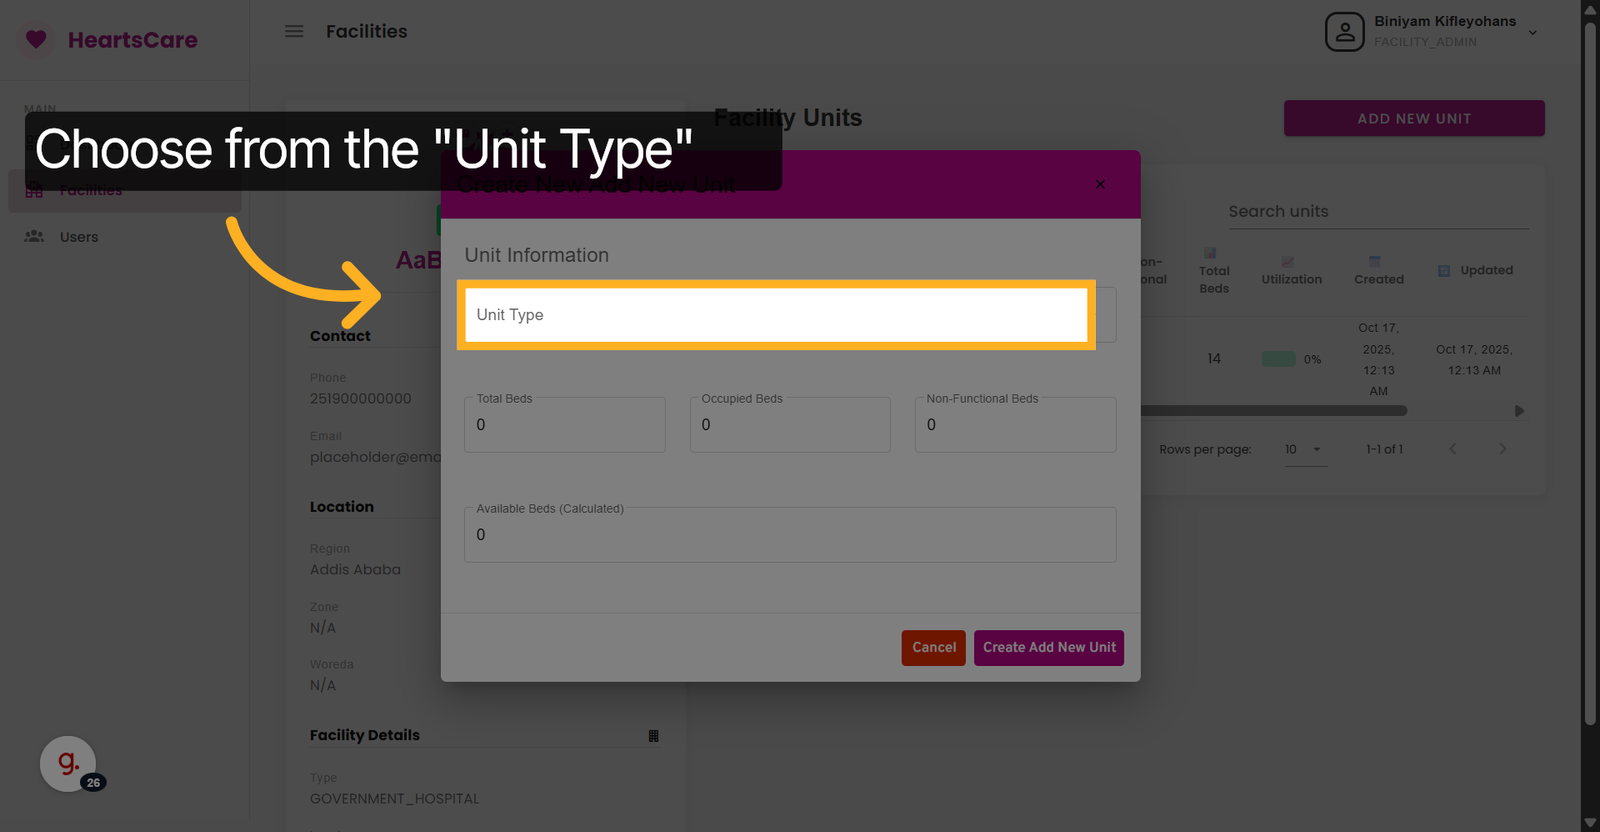
19. Select Unit Type Field
Click Unit Type to choose the category for the new ICU unit.
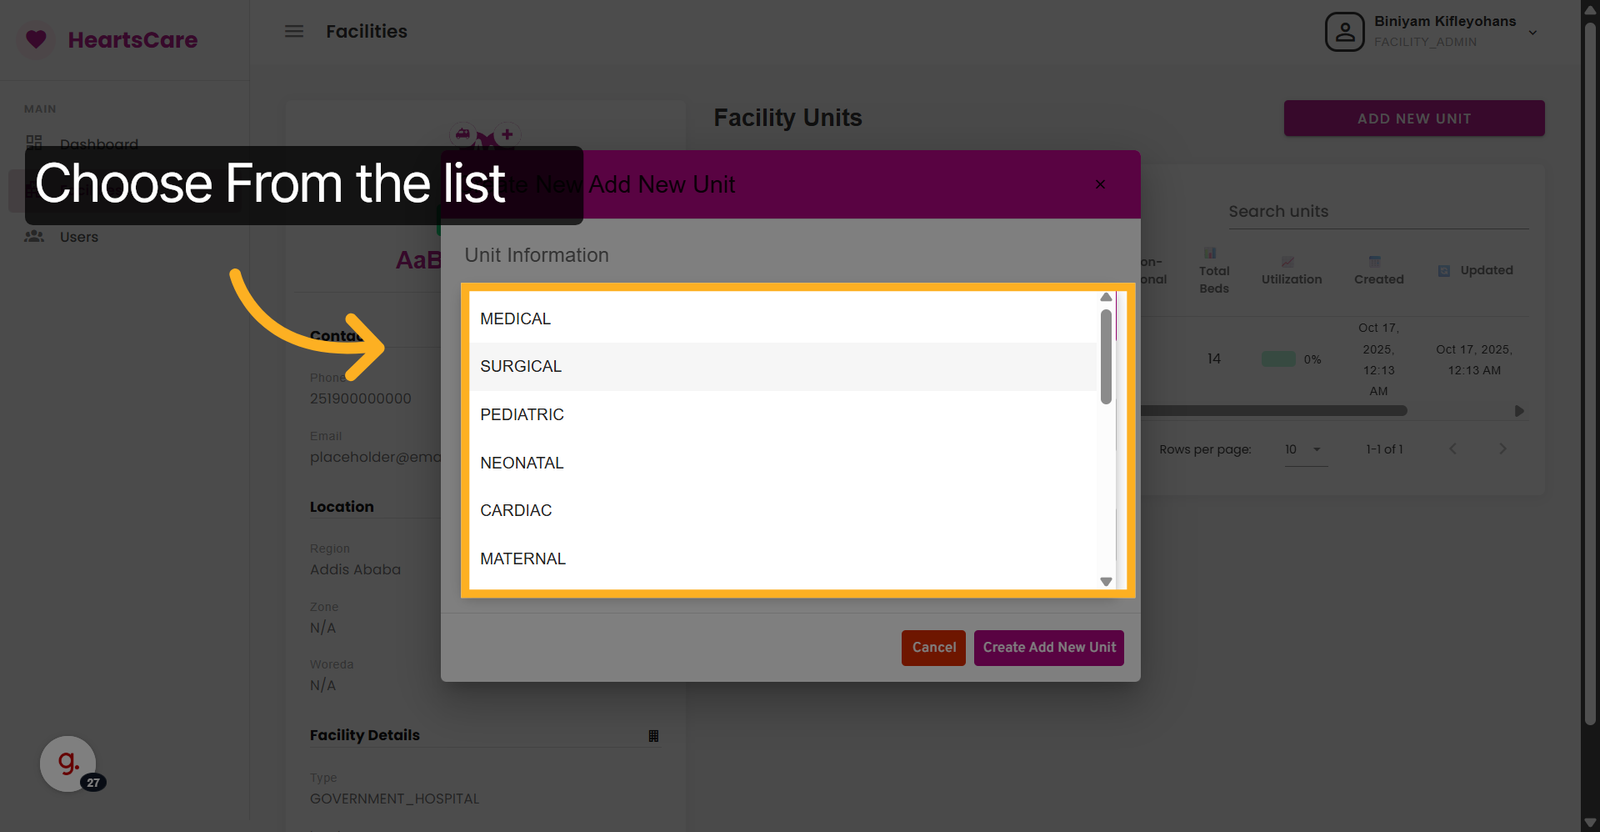
20. Choose Unit Type
Select one from the list of available unit types for the new ICU unit.
21. Fill the Fields
Click Total Beds, Occupied Beds and Non-functional Fields to specify the number of beds in the new unit.

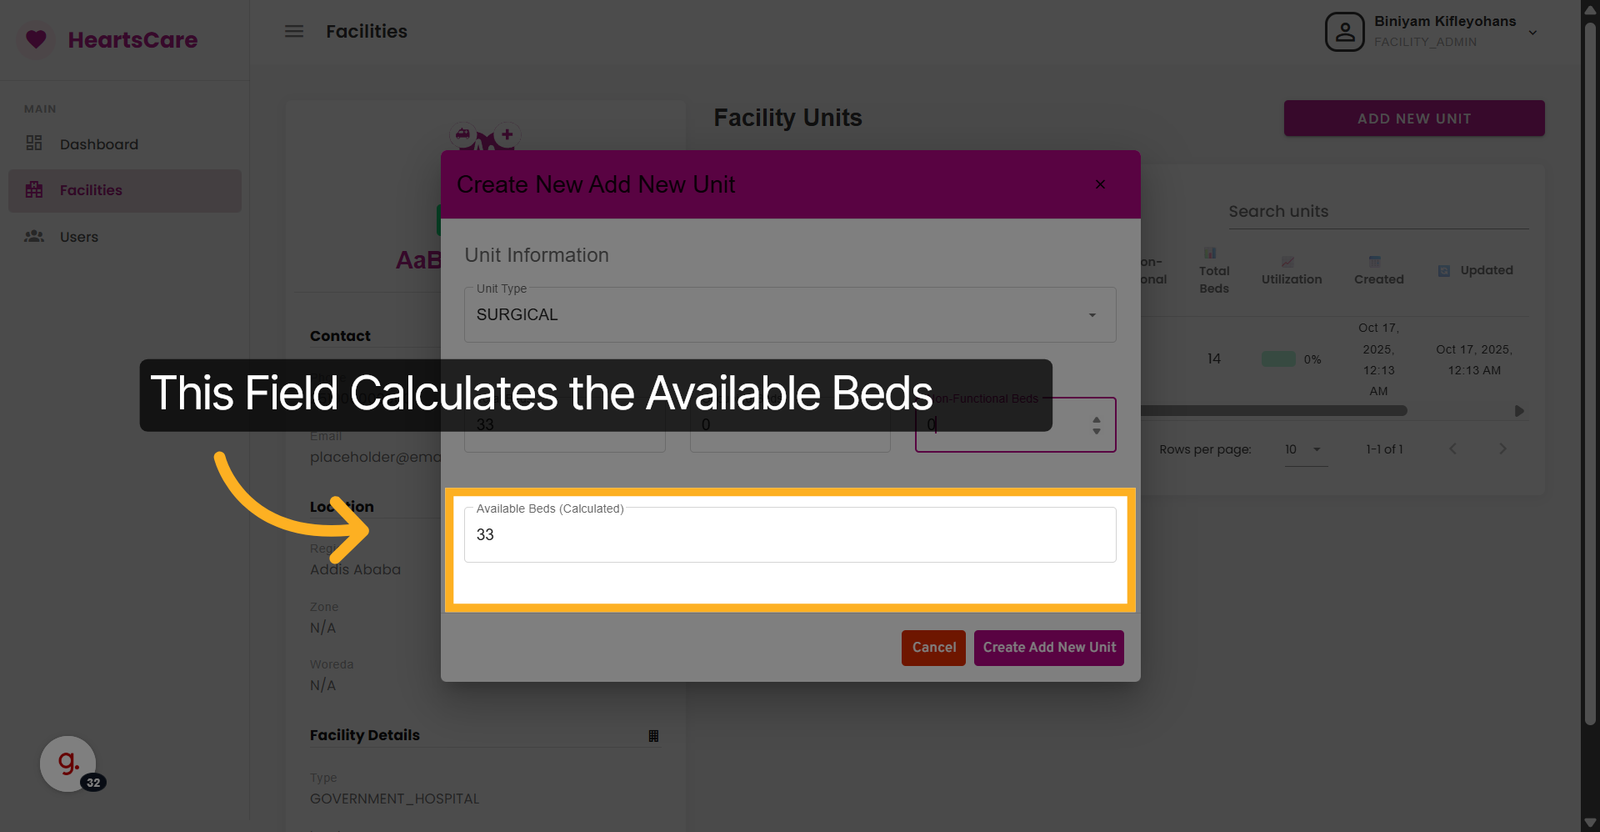
22. Check Available Beds Field
Check Available Beds (Calculated) - the number of beds available for use.
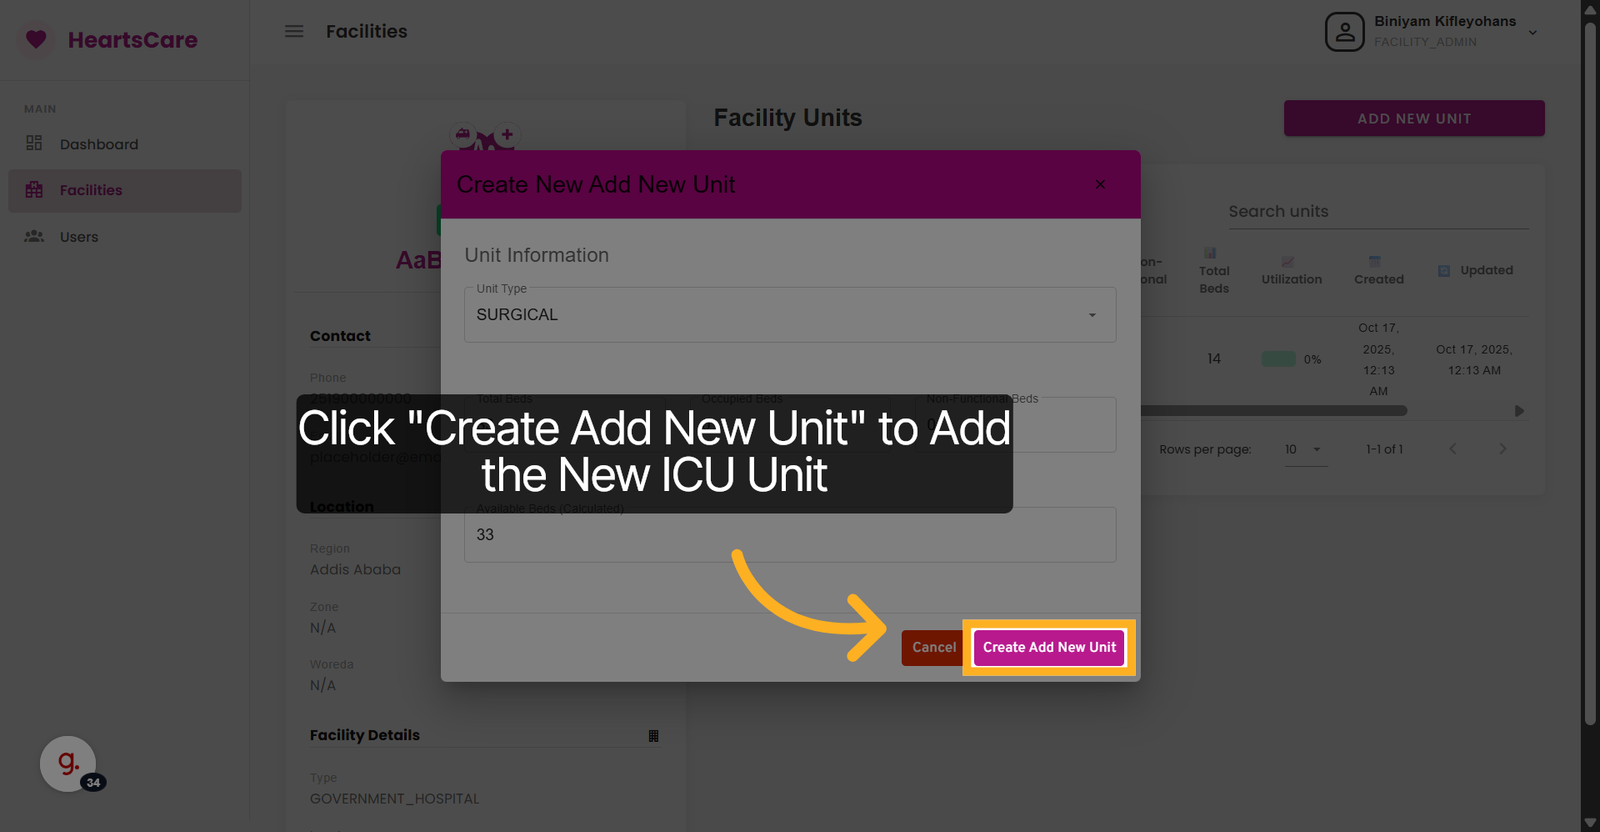
23. Submit New Unit Creation
Click Create Add New Unit to save the new ICU unit details.
Bed Management
Add, update, and manage individual ICU beds and their status.
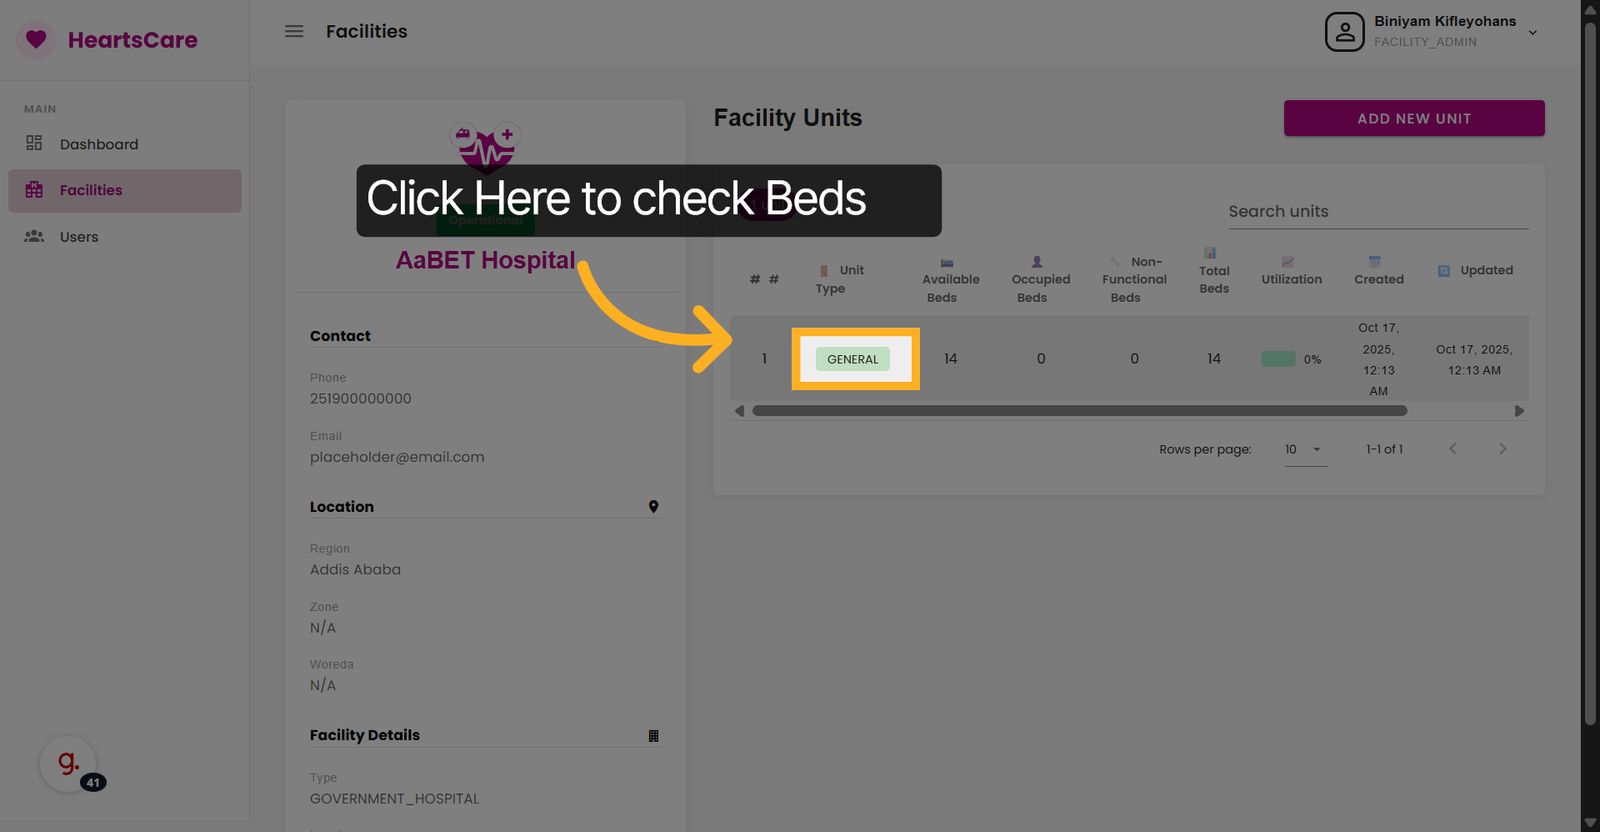
24. Select The Unit you want to manage
Click General to choose the general unit type for management.
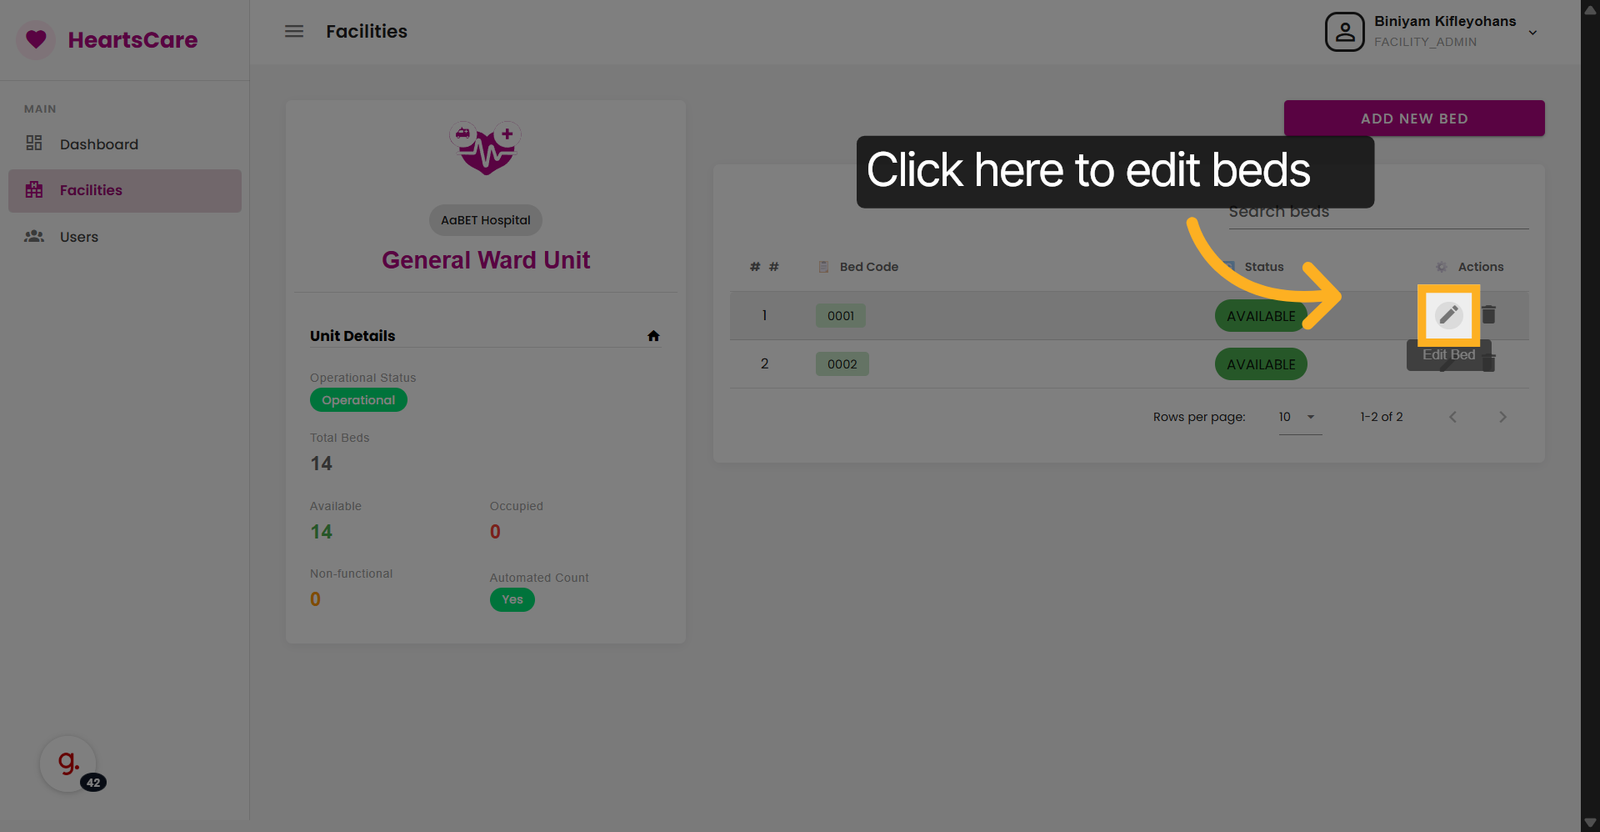
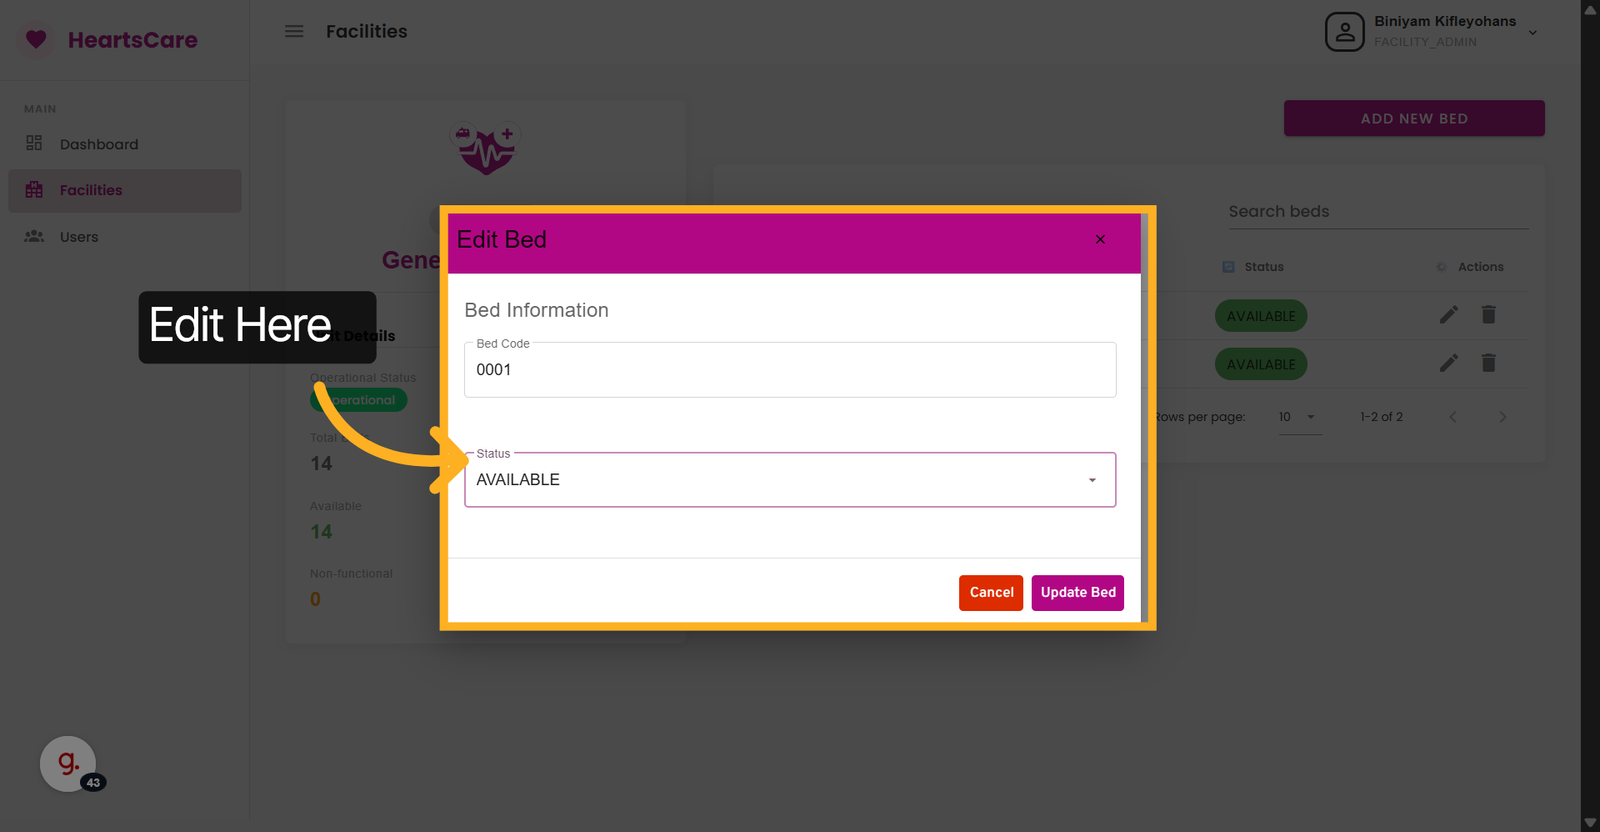
25. Click the Icon to edit the bed
Click here to Edit or Manage a specific bed.
26. Open Status Filter
Click Status to filter beds or units by their current status.
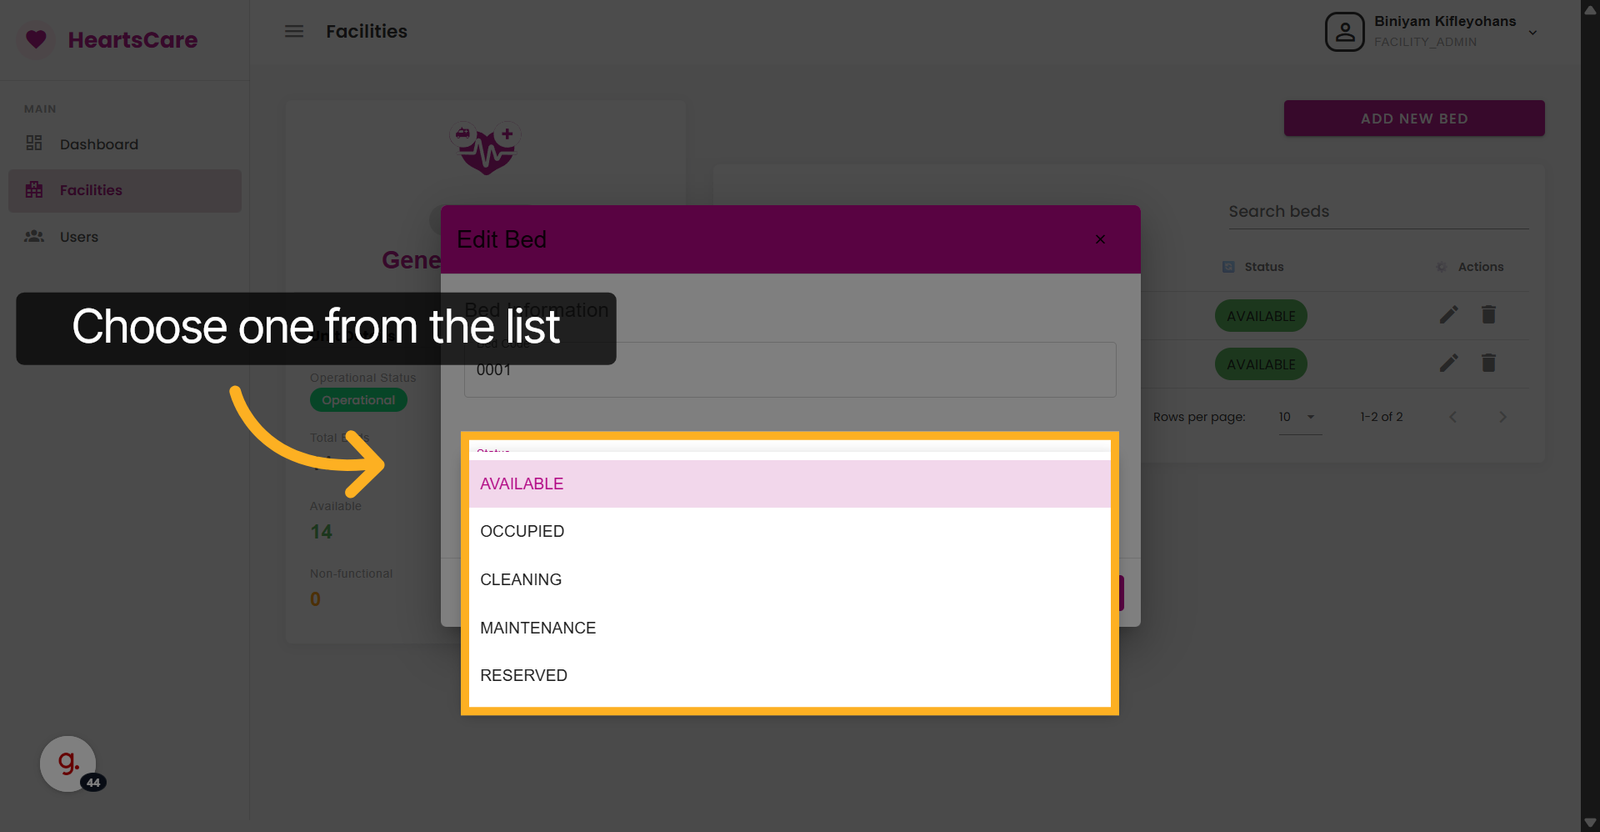
27. Choose Available Status
Select One to assign the bed's status .
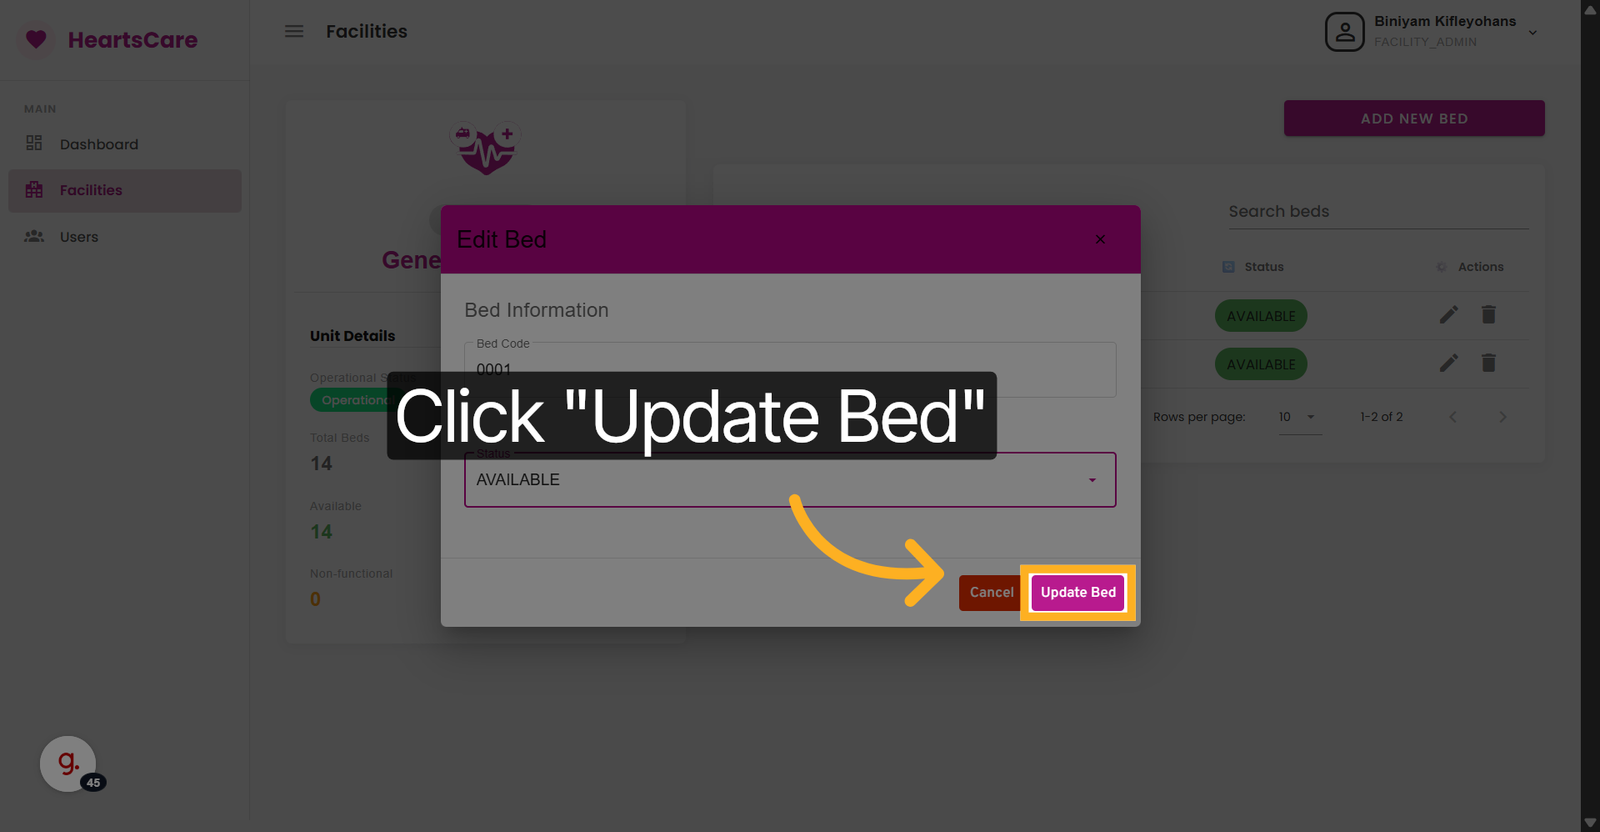
28. Submit Bed Status Update
Click Update Bed to save changes made to the bed status.
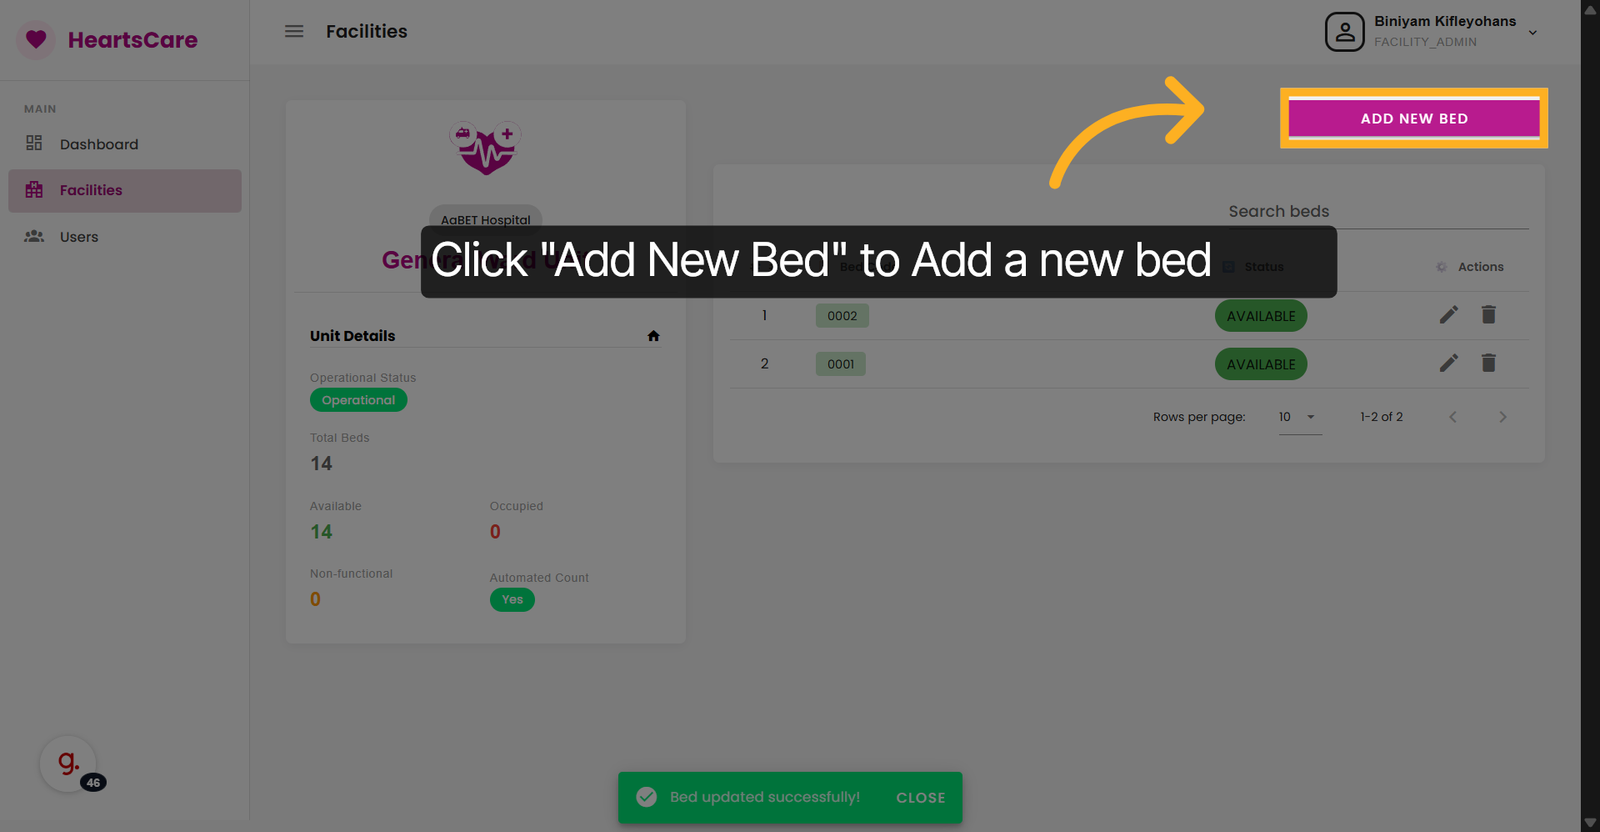
29. Initiate Adding New Bed
Click Add New Bed to start the process of adding a new bed to the unit.
30. Select Bed Code Field
Click Bed Code to enter the identifier for the new bed.
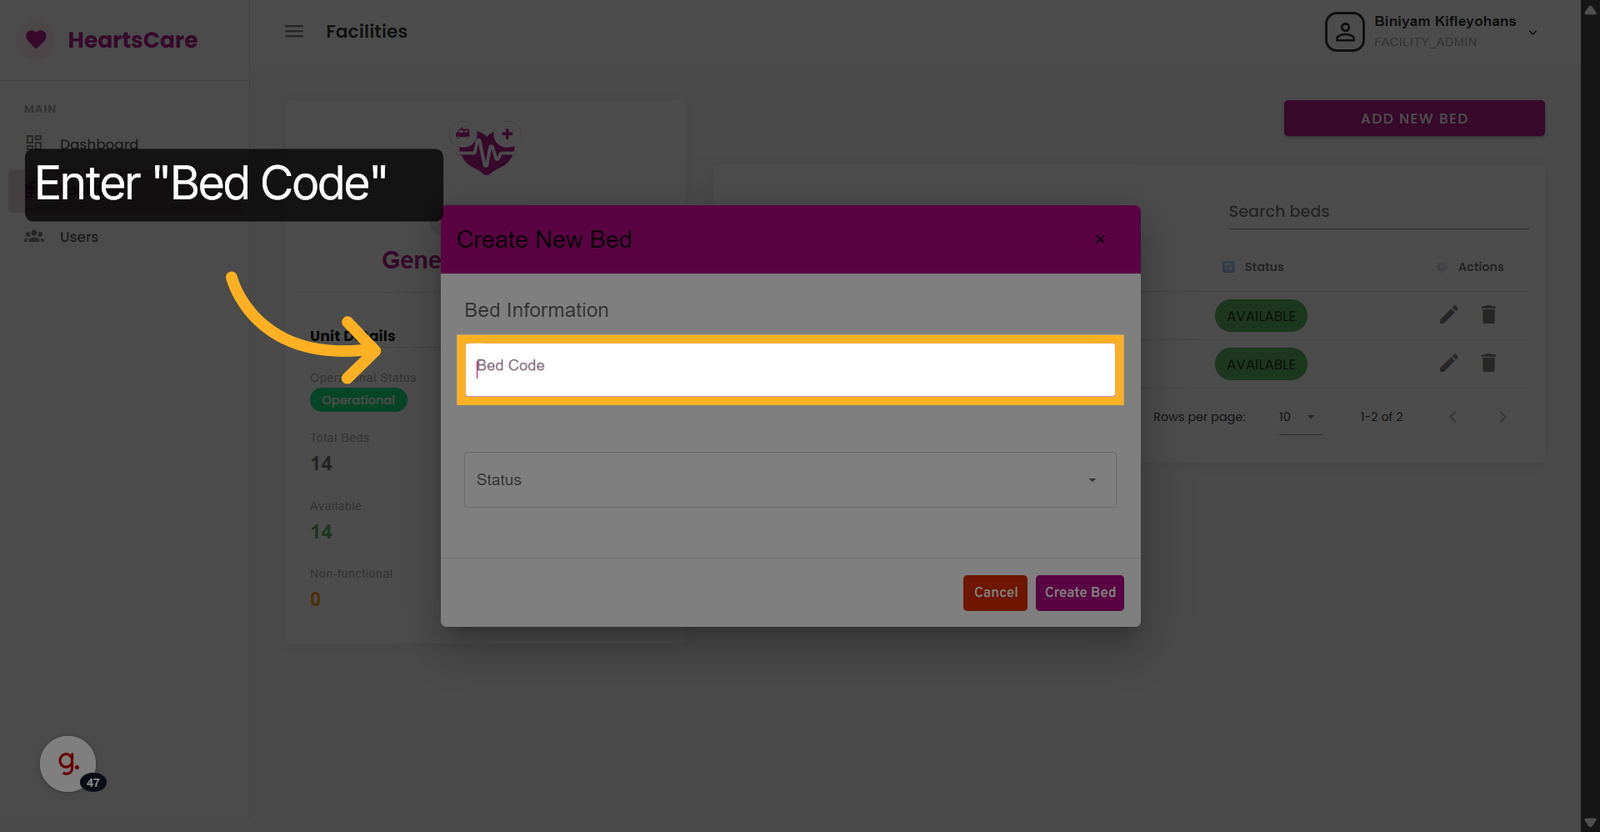
31. Enter Bed Code
(e.g. Enter 003 as the unique code for the new bed being added.)

32. Navigate Further
Click here to proceed with bed status selection.
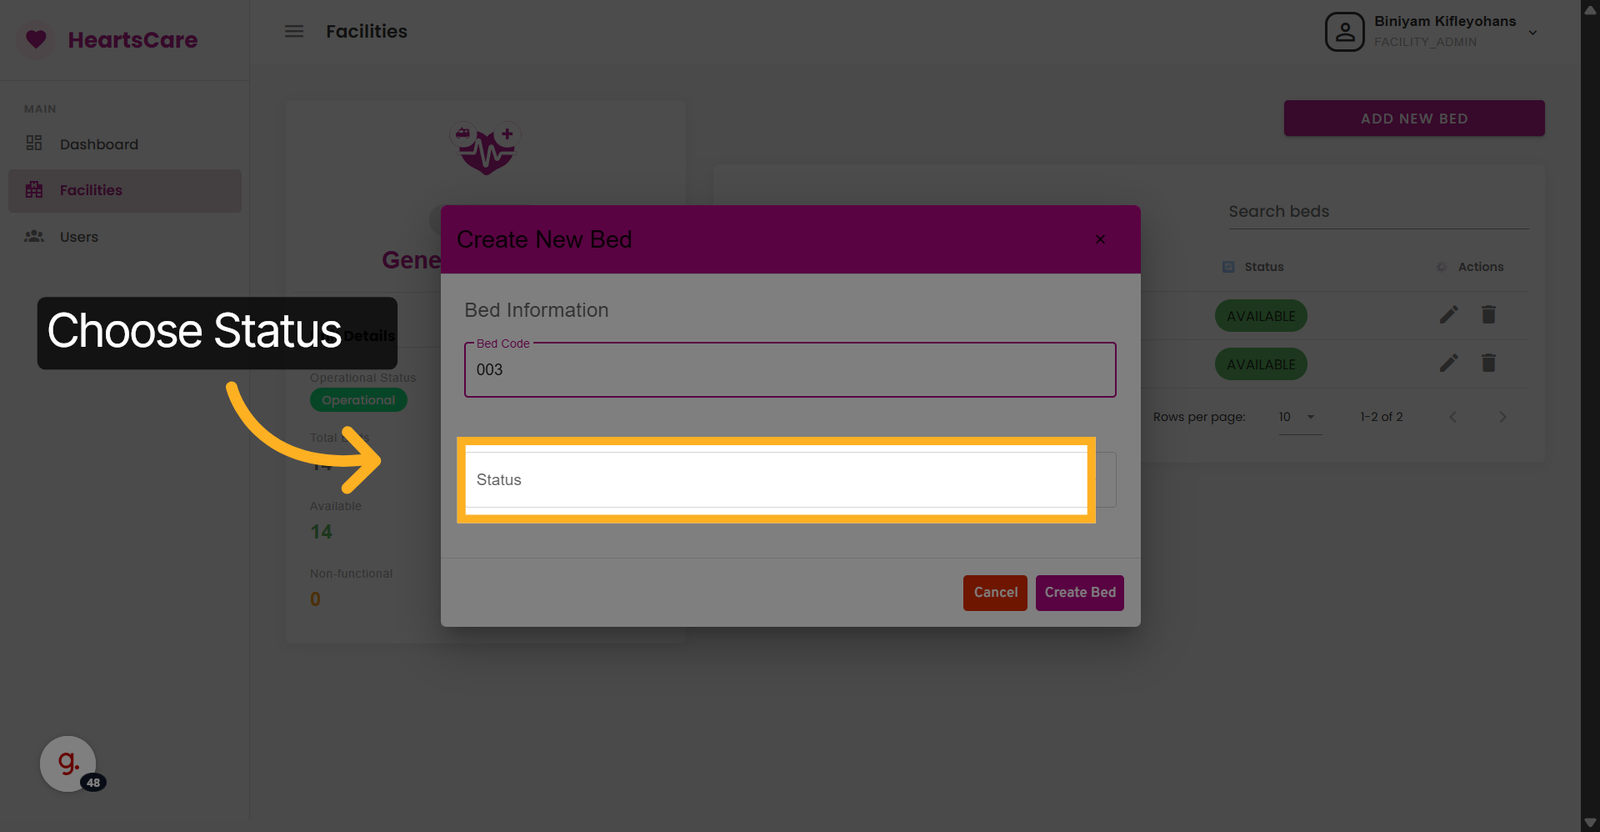
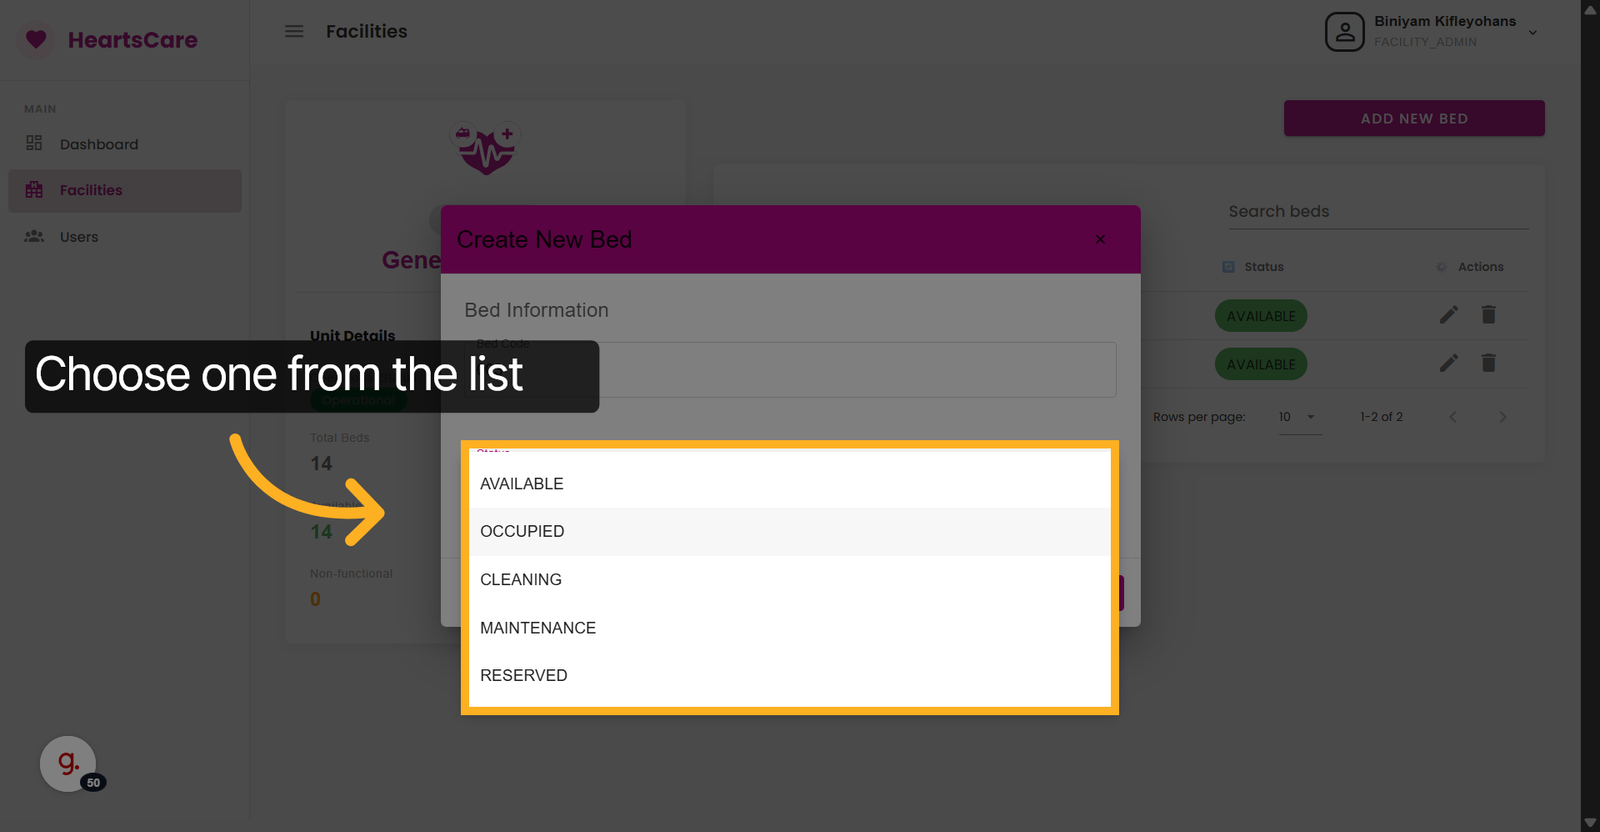
33. Select the Status of the bed
Click One to mark the new bed's status.
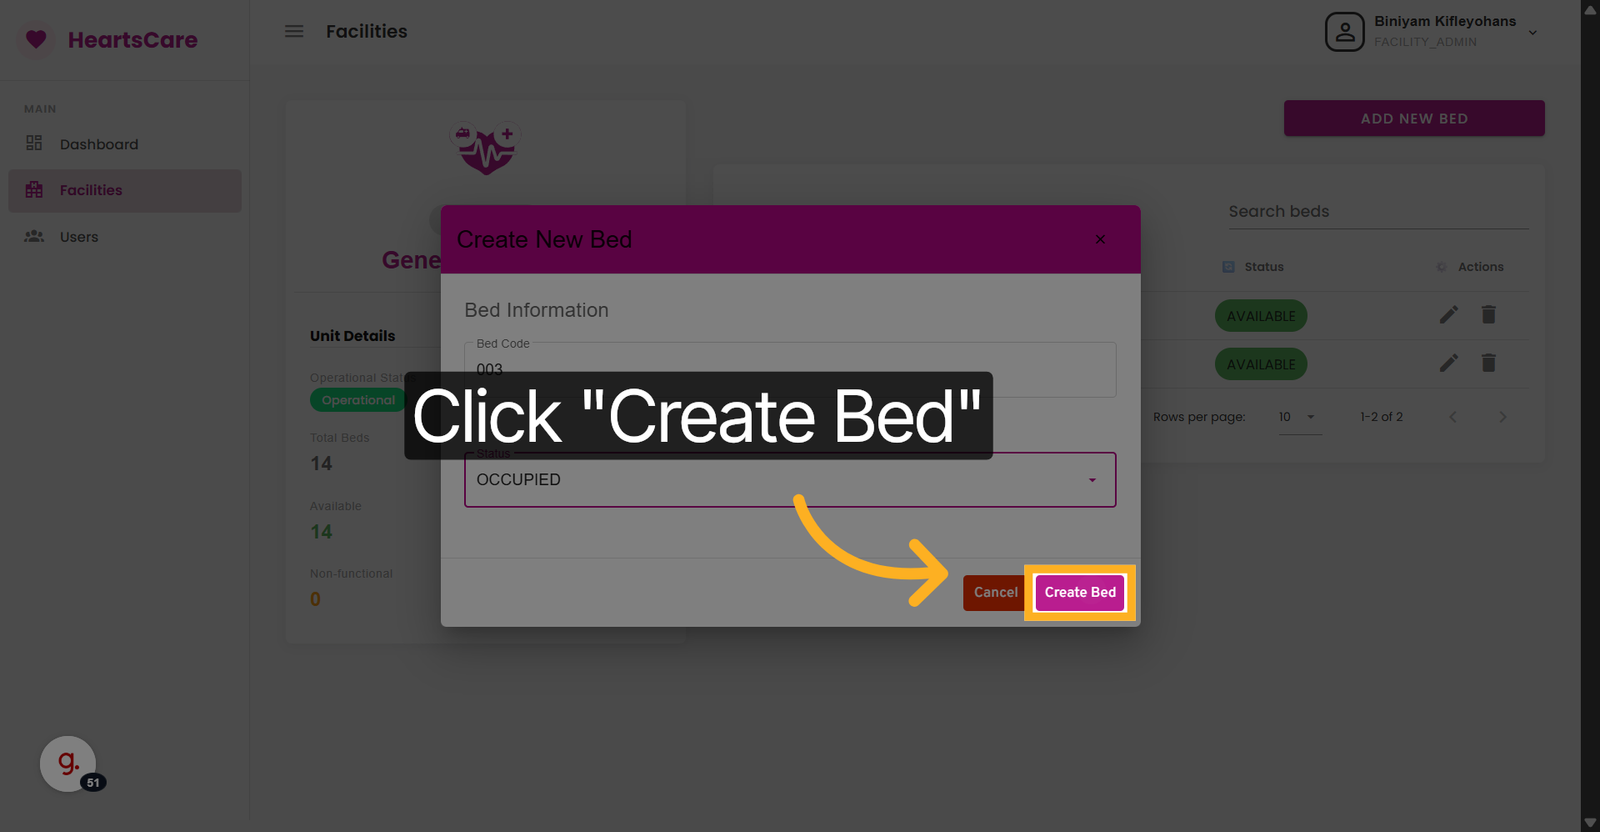
34. Confirm Bed Creation
Click Create Bed to save the new bed with its assigned status.
35. Delete Bed
Click here to Delete the bed from the unit.

36. Select Bed Code
Fill the bed's code to proceede with deleting the bed. (e.g. Click 003 to select the bed with code 003 for further actions.)

37. Delete Selected Bed
Click Delete to remove the bed from the unit.
User Management
Manage user accounts, permissions, and access controls.
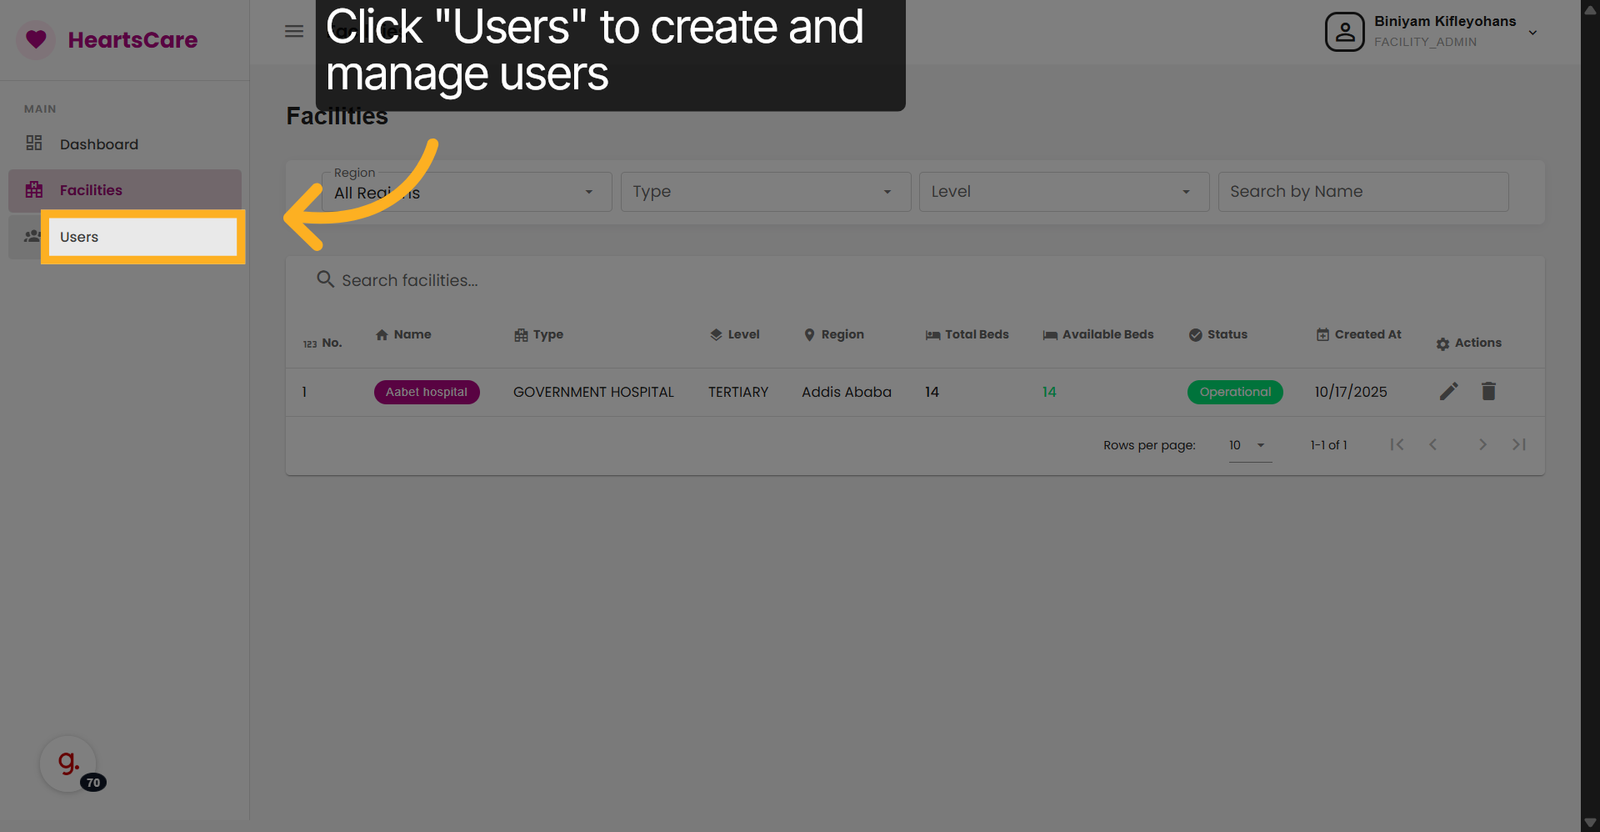
38. Open Users Section
Click Users to manage user accounts associated with the facility.
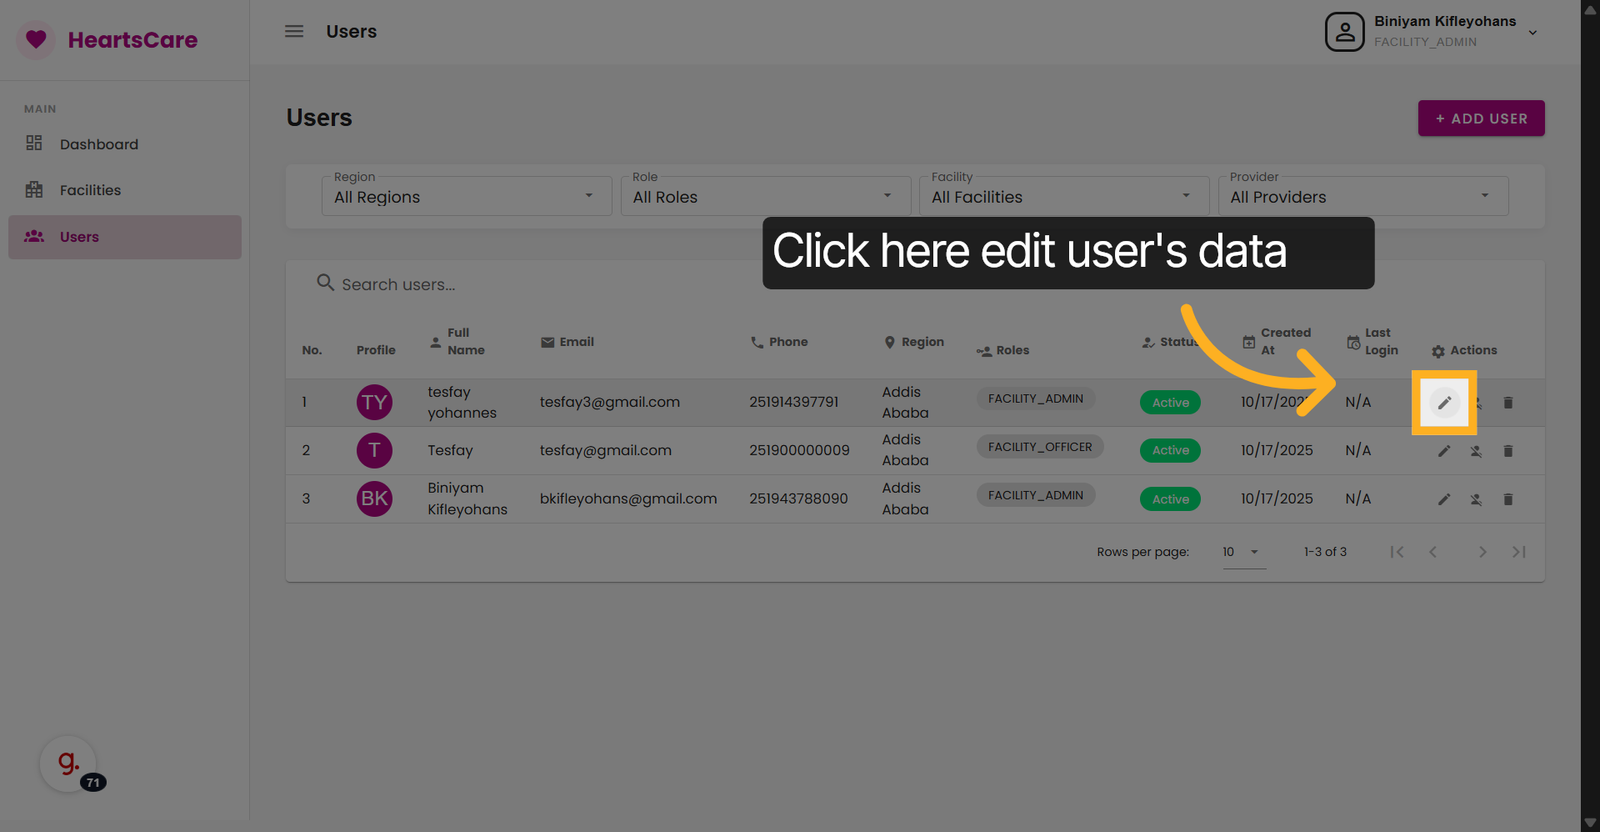
39. Edit User's Data
Click here to edit user details.
40.Change User's data
Change the Desired field and Update to save the changes.
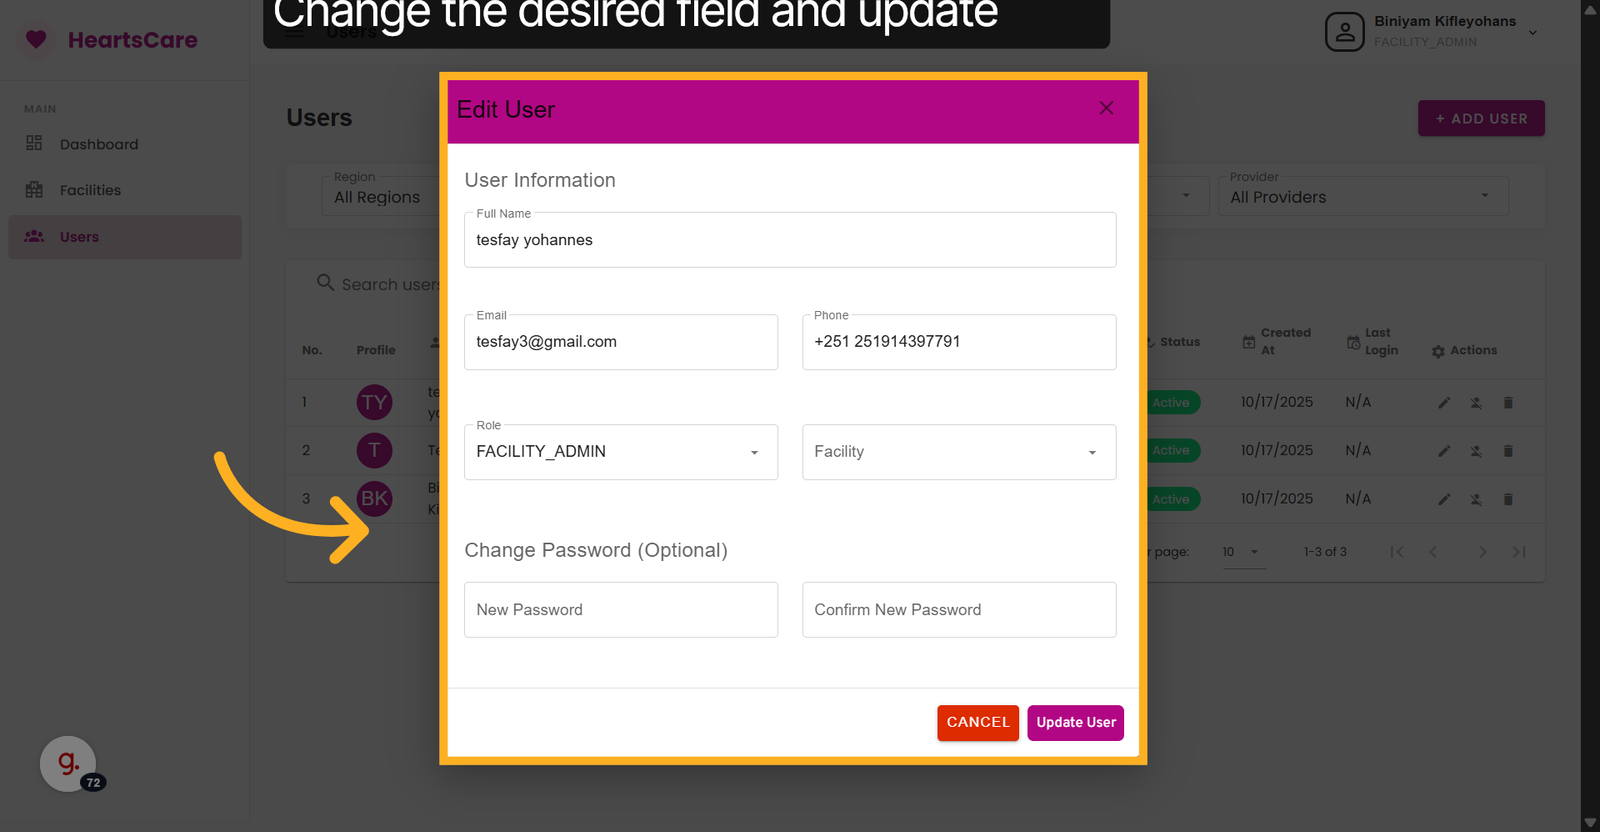
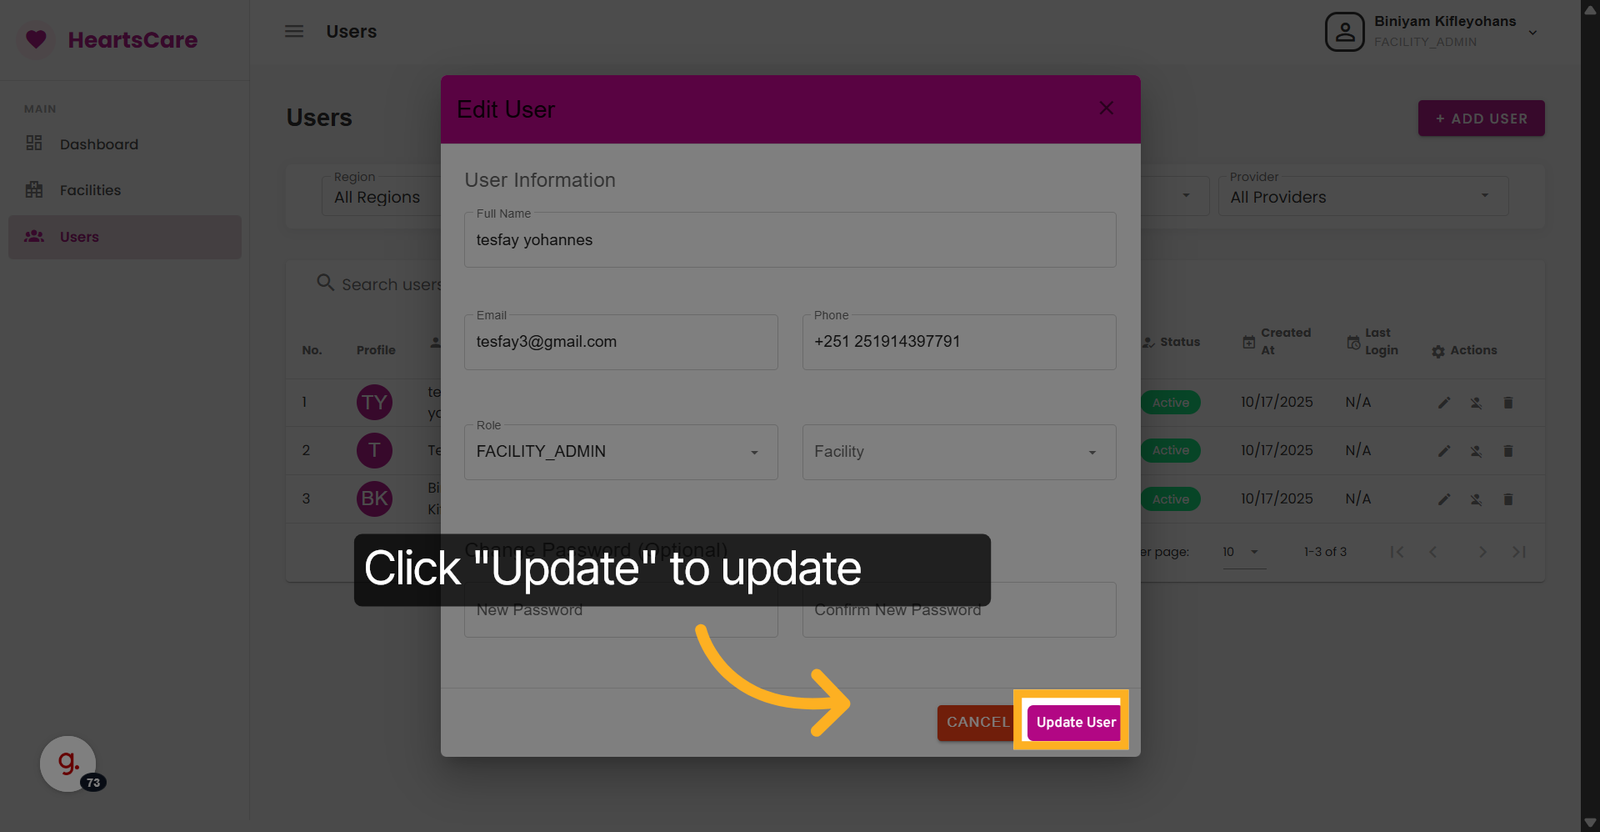
41. Click Update
Click Update to Save changes made to the User's detail;.
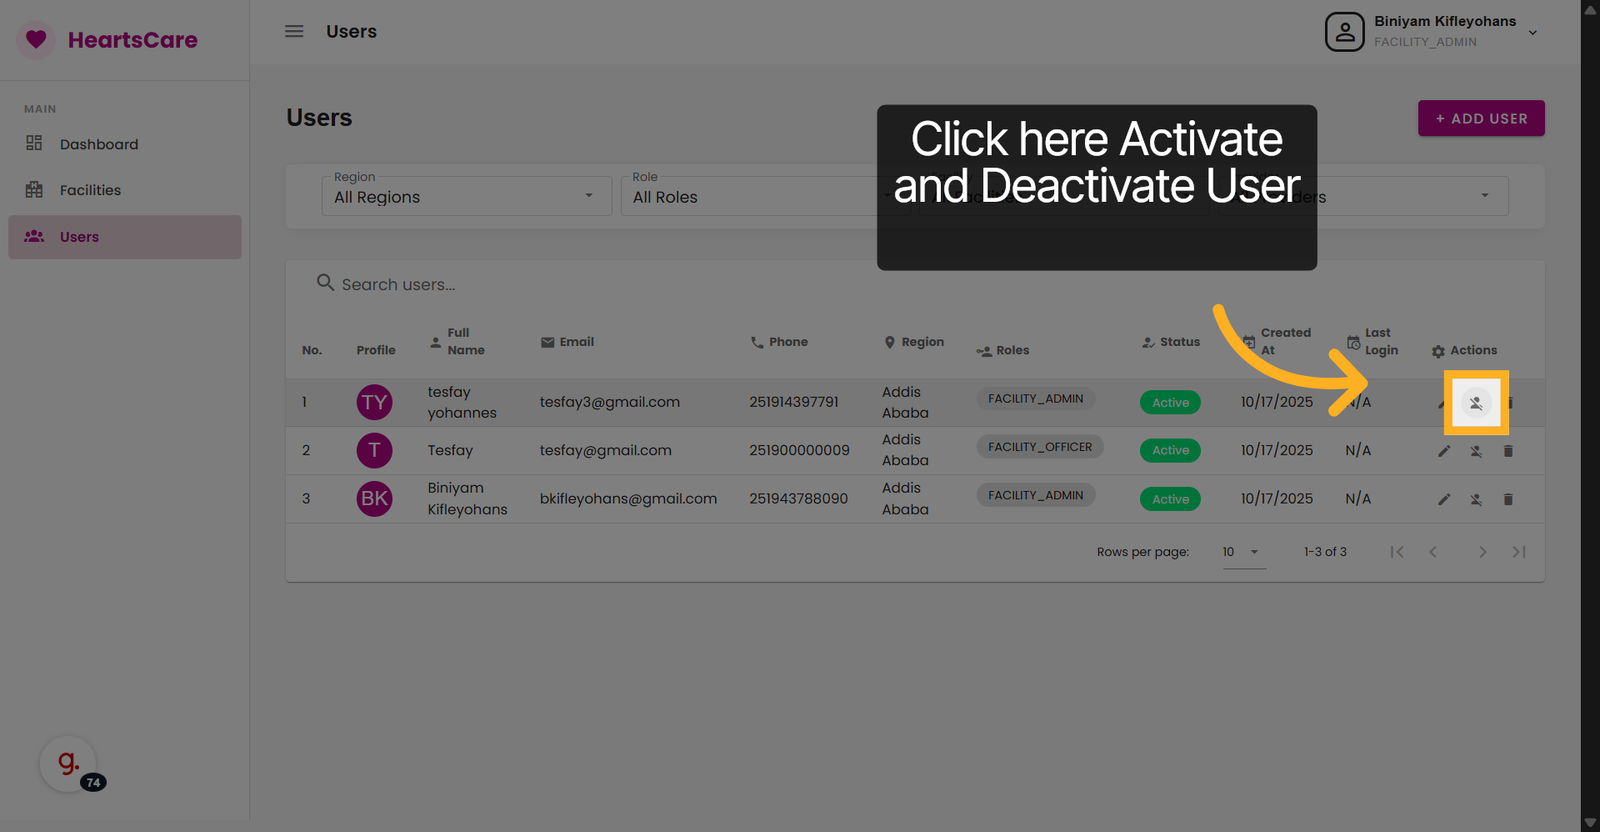
42. Click to Deactivate User Account
Click the icon to Deactivate a user account.
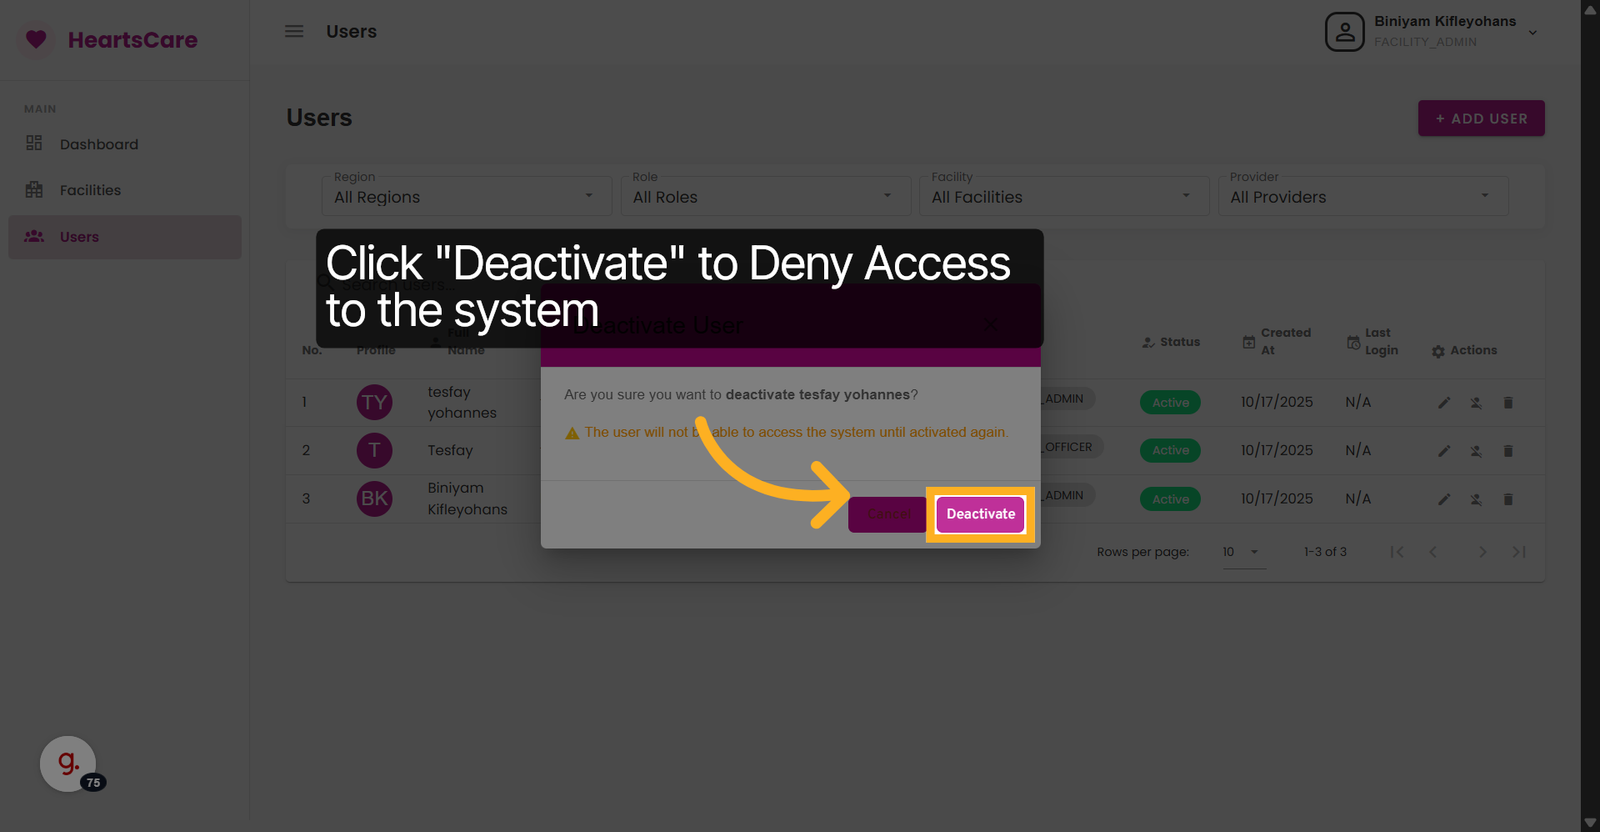
43. Deactivate User Account
Click Deactivate to disable a user account temporarily or permanently.
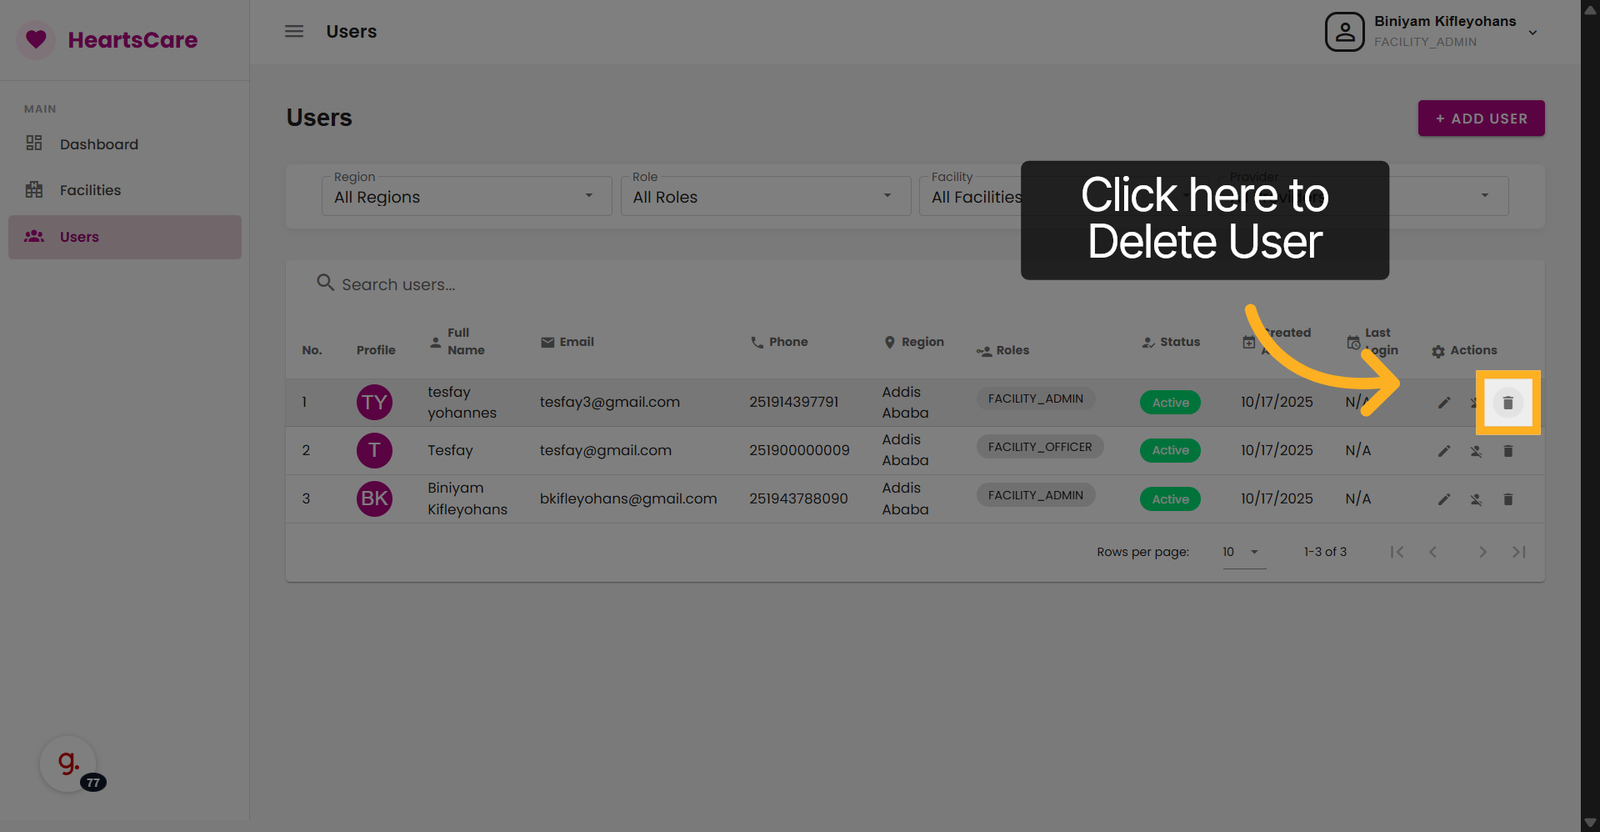
44. Click to Delete User
Click the Icon to Delete User Account.
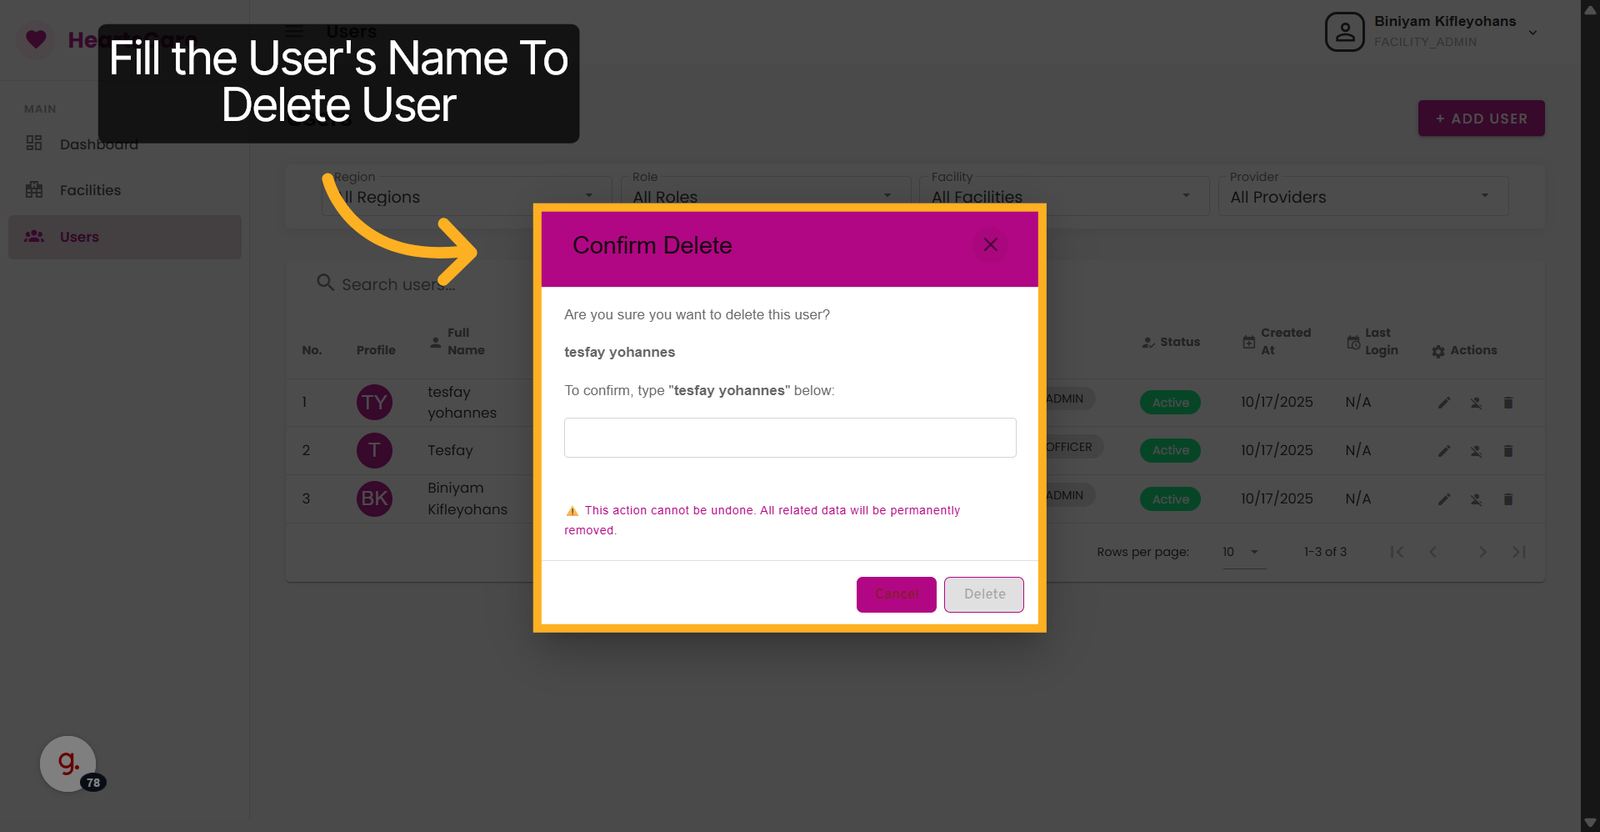
45. Confirm Delete
Fill the User's name to continue Deleting the User Account and Click "Delete" to Delete the Account.
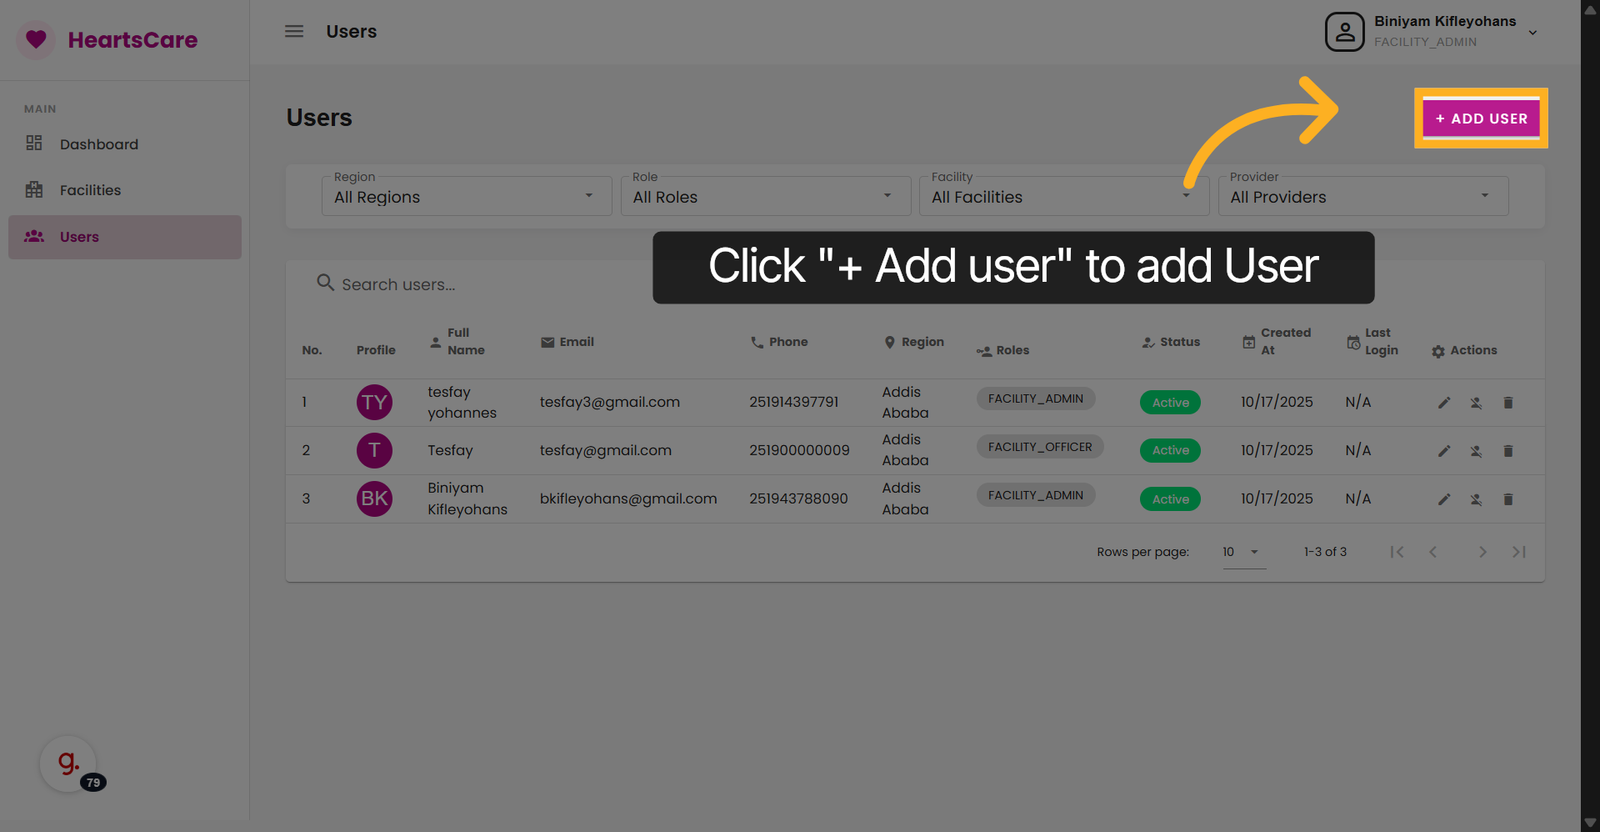
46. + Add New User
Click + Add user to begin creating a new user account for the facility.
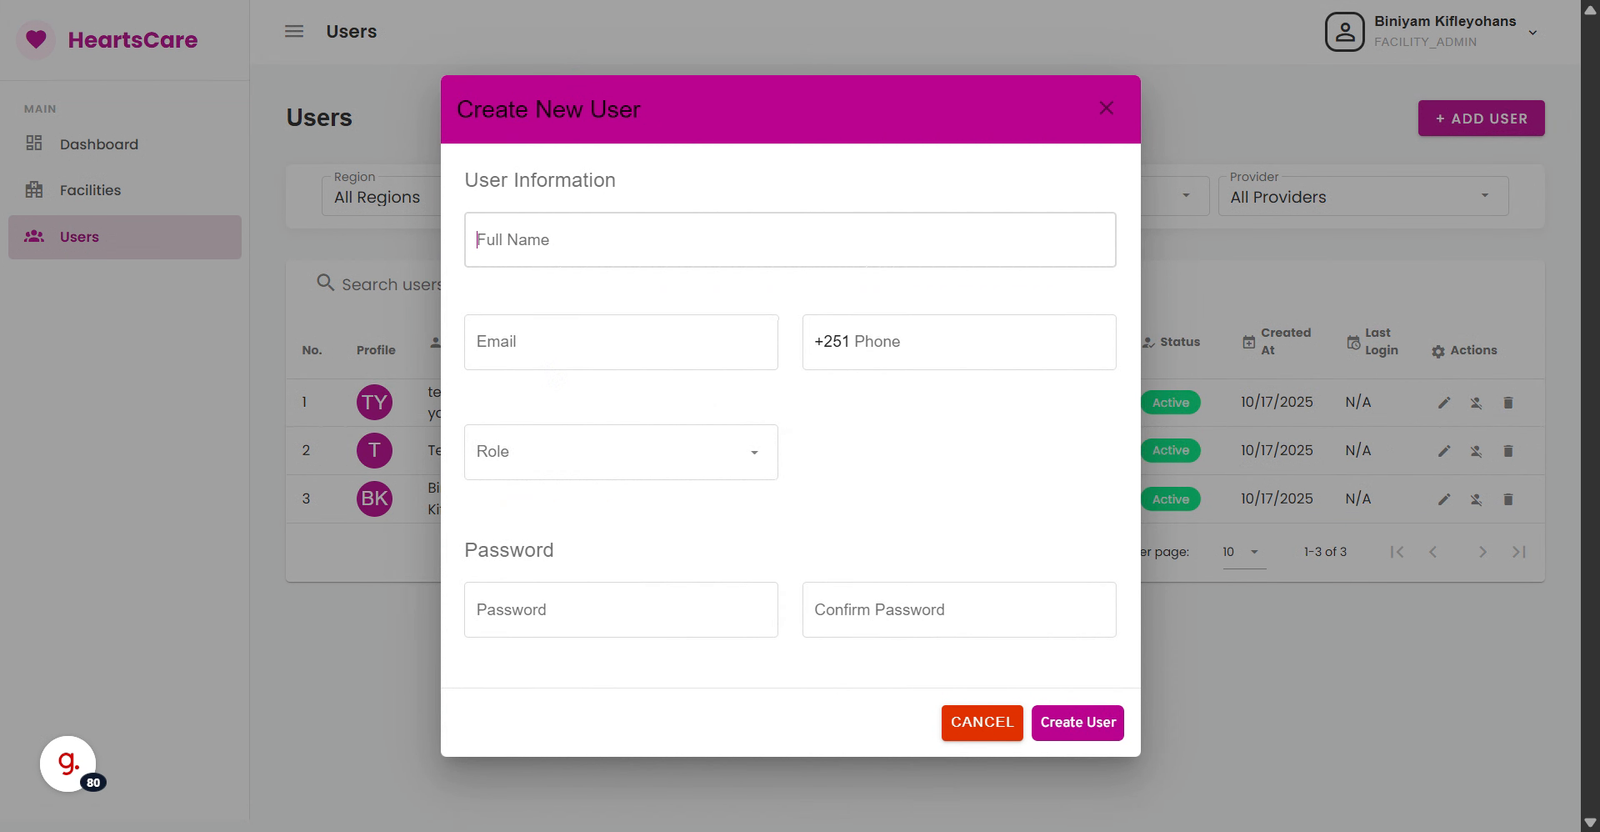
47. Select the Fields
Click the fields to fill the new user's details.

48. Navigate and Fill
(e.g. Enter the full name of the new user to identify them in the system.)
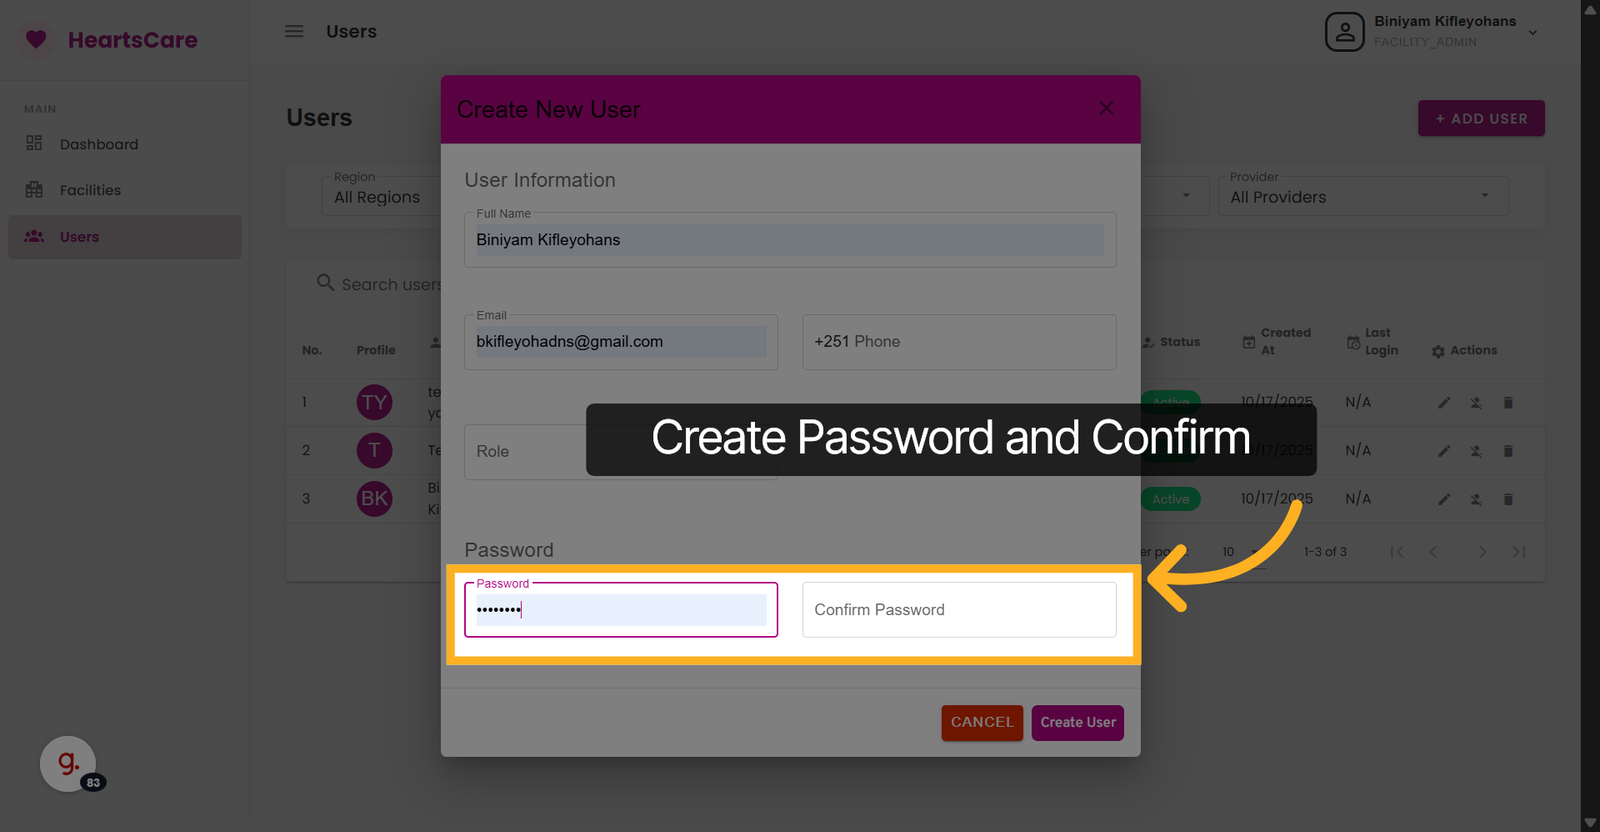
49. Create Password
Create and confirm password for thr User's Account.
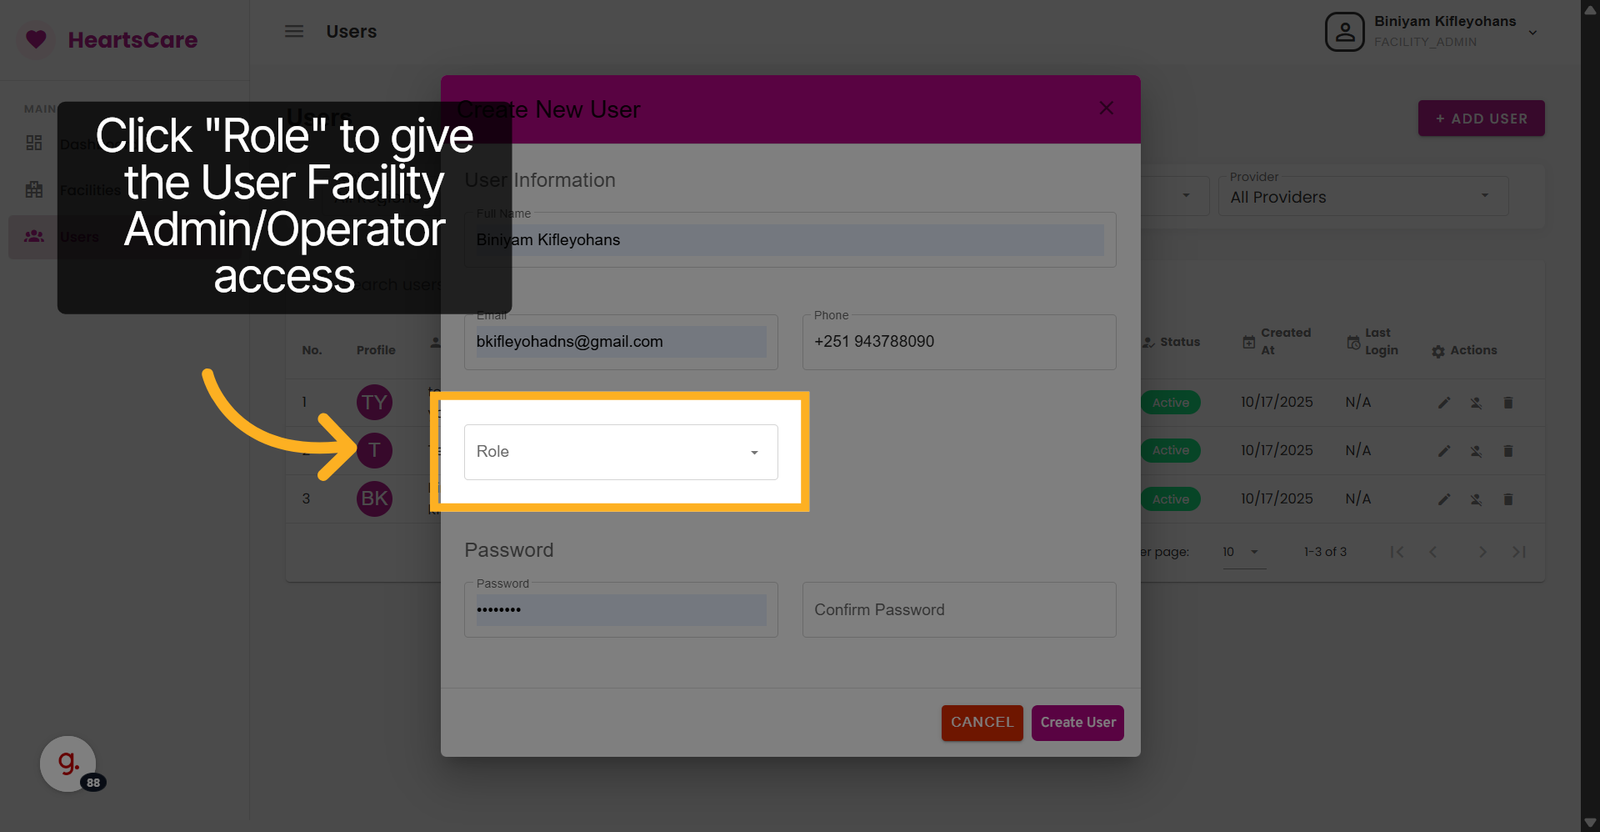
50. Select Role
Click Role to Assign the role to the User's Account.
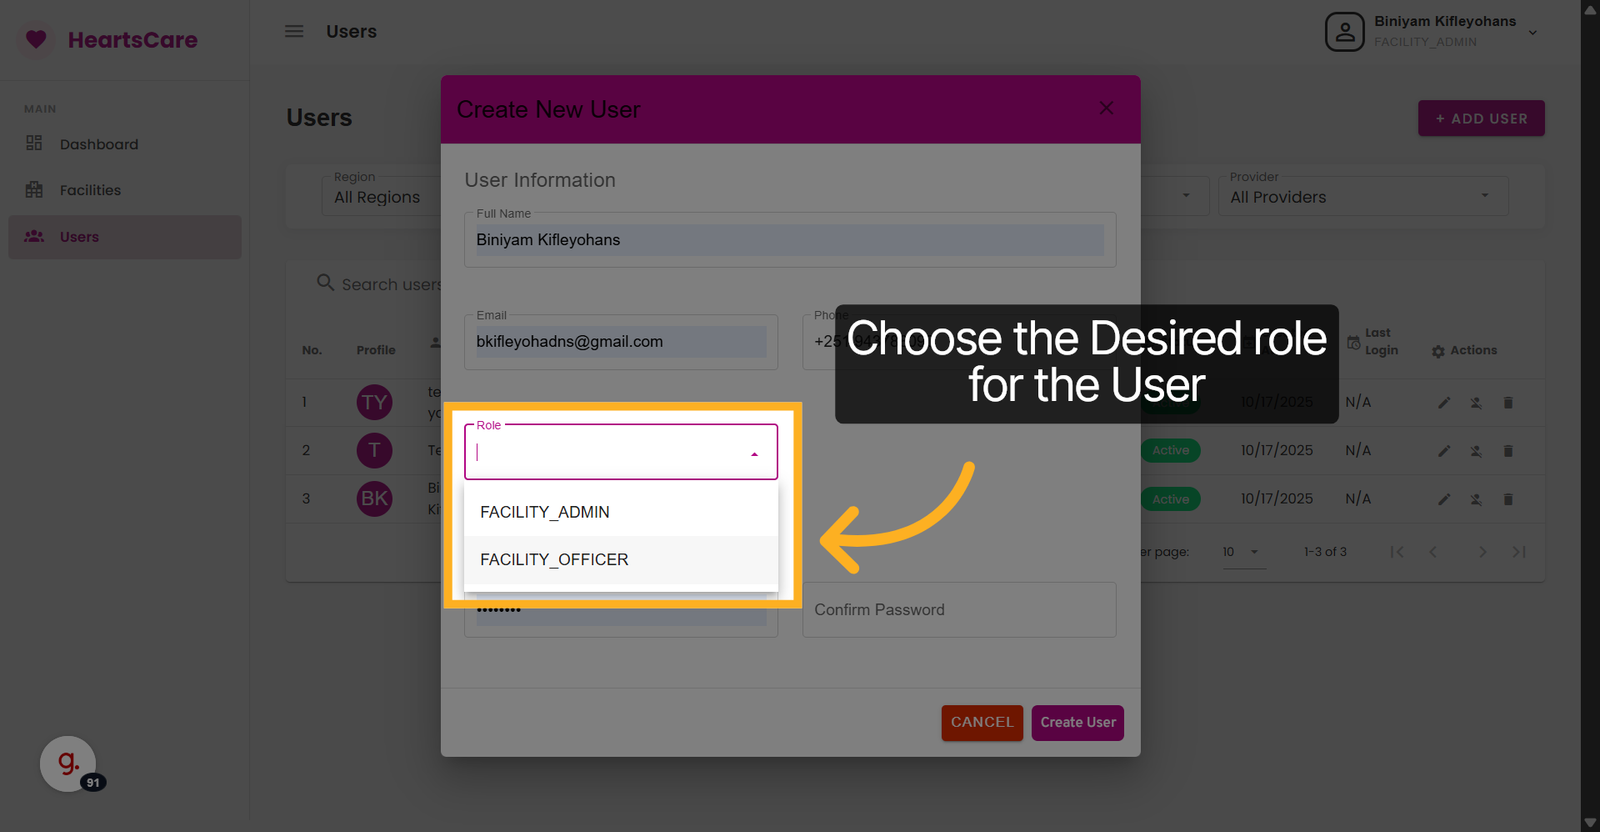
51. Choose Role
Choose the Desired role to assign to the User's Account.
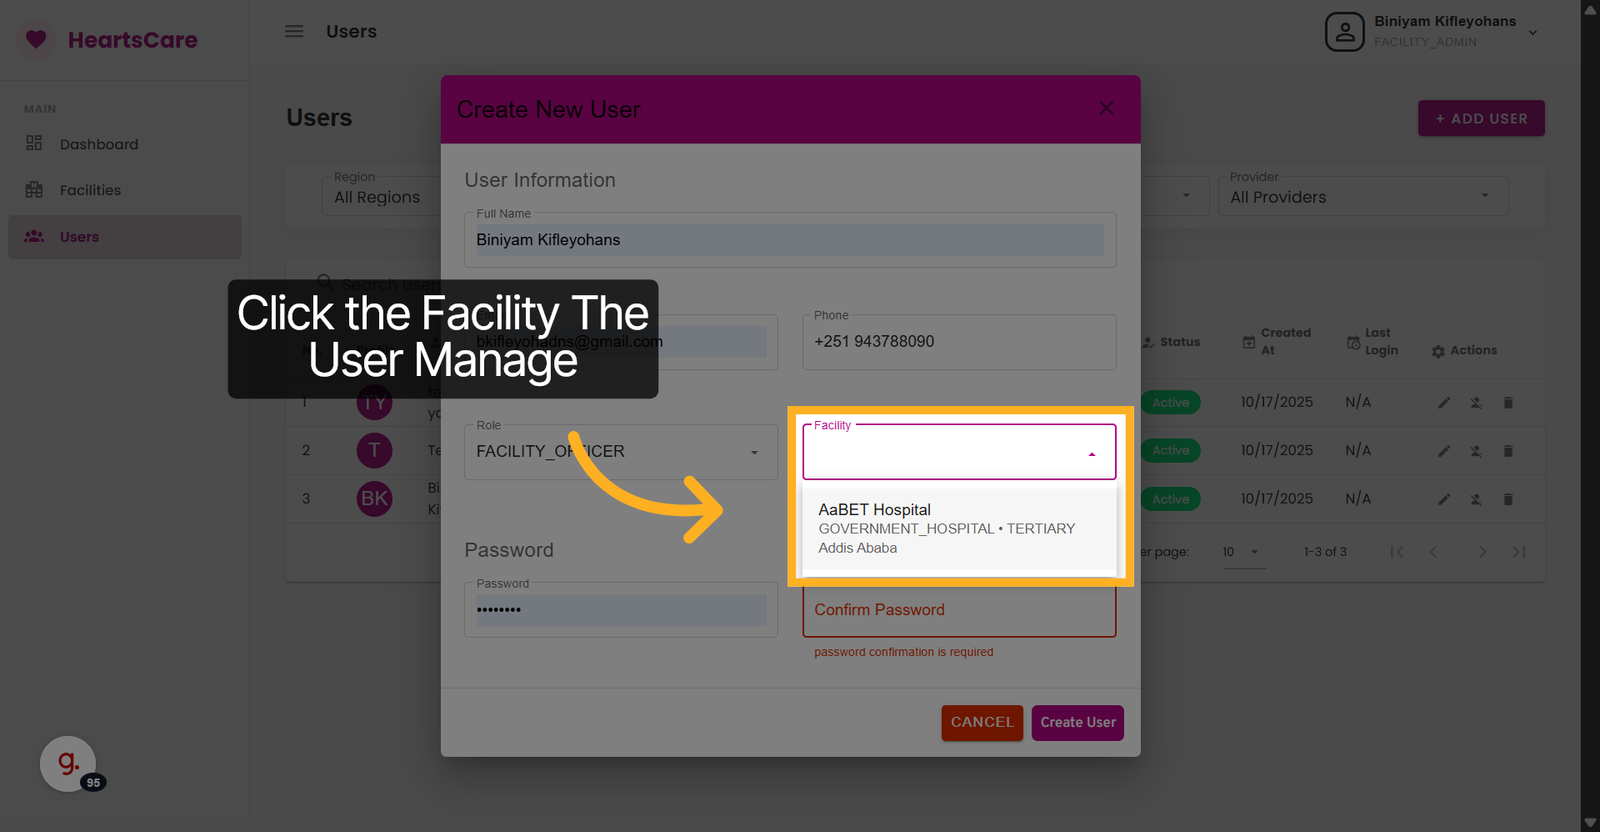
52. Choose facility
Choose the Facility the User is to manage.
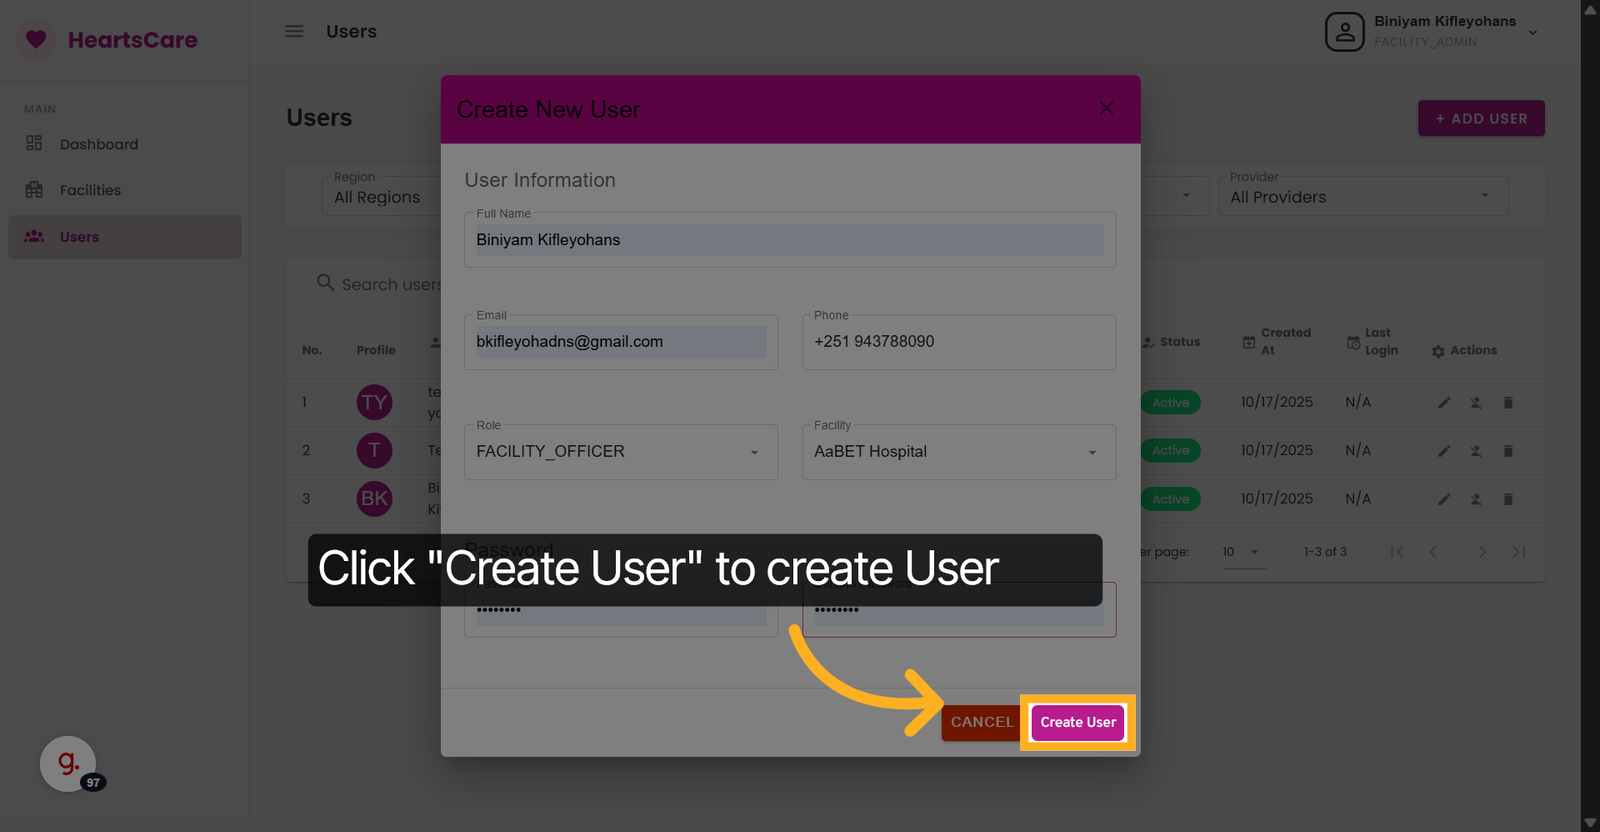
53. Create User
Click Create User to create User.